Using the Monitor tab
Use the Monitor tab to run reports on employee data. Choose from:
-
 VARIANCES REPORT
View records on annual leave and paid absence.
-
Open the Monitor tab.
-
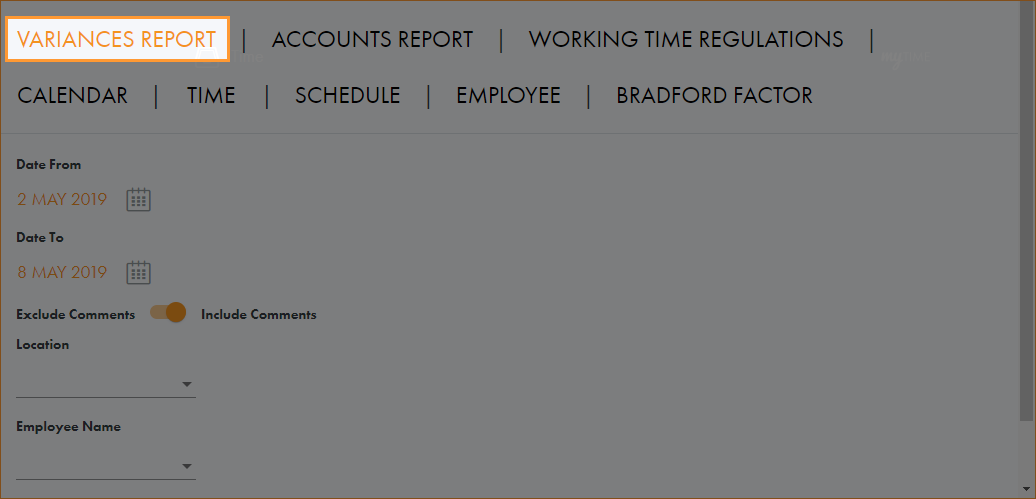
Select VARIANCES REPORT:
-
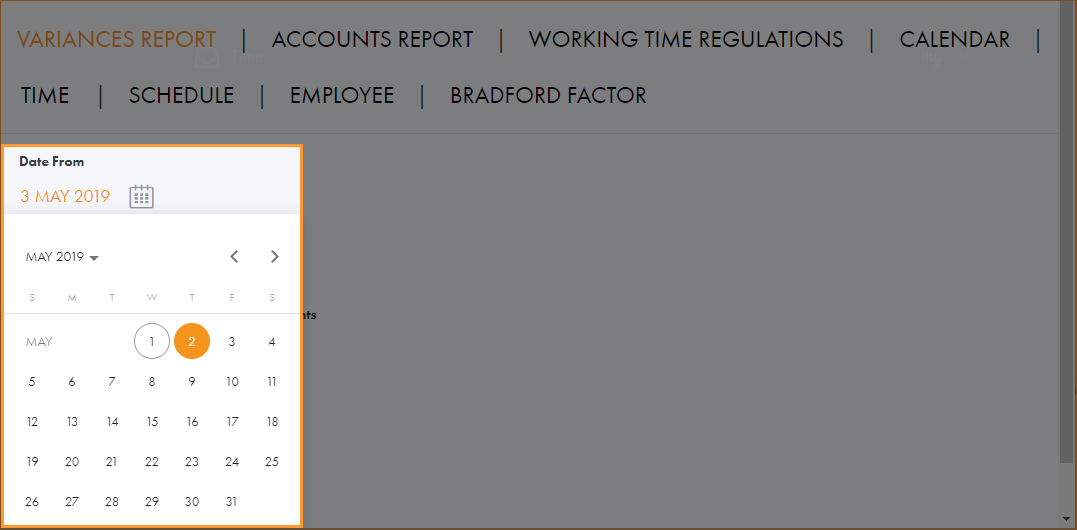
Click on the calendar icons and select the period that you want to report on:
-
Use the Comments slider to choose whether comments are included in the report. Comments can be added when adding a variance for an employee.
-
Select a Location and Workgroup to report on. This is optional.
-
Select a specific Employee to report on. The list is filtered as you make your selections for Location and Workgroup. This is optional.
-
Click RUN REPORT.
-
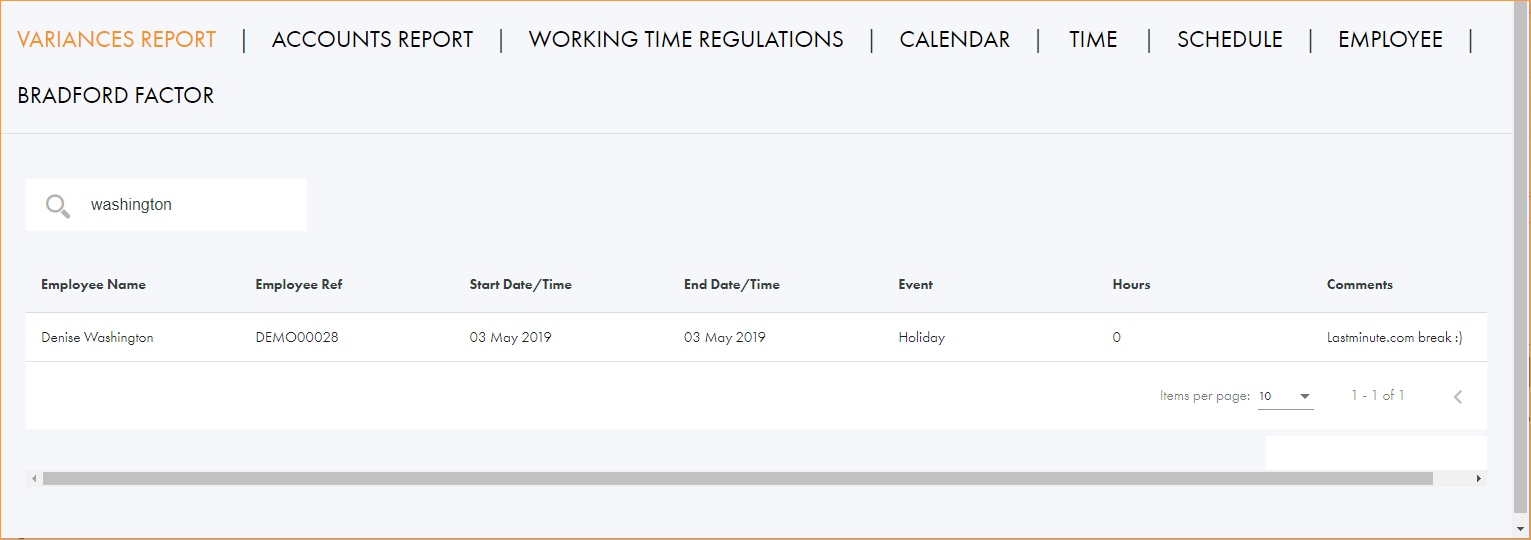
All employees with a logged variance within the parameters you have set are listed:
-
Use the search field in the top left to search for a specific employee. Start typing in the field to filter the list of employees. The search field recognises any part of employee first name or last name.
-
Click in the column headers to sort the information displayed as required.
-
In addition to Employee Name and Employee Ref, columns display the following information:
Column
Refers to...
Start Date/Time
The start and end date and time of the variance.
End Date/Time
Event
This type of variance.
Hours
The amount of working hours affected by the variance.
Comments
Comments added when adding a variance.
-
Use the navigation tools at the bottom of the screen to determine the number of records that are displayed on the screen and move through the pages of records.
-
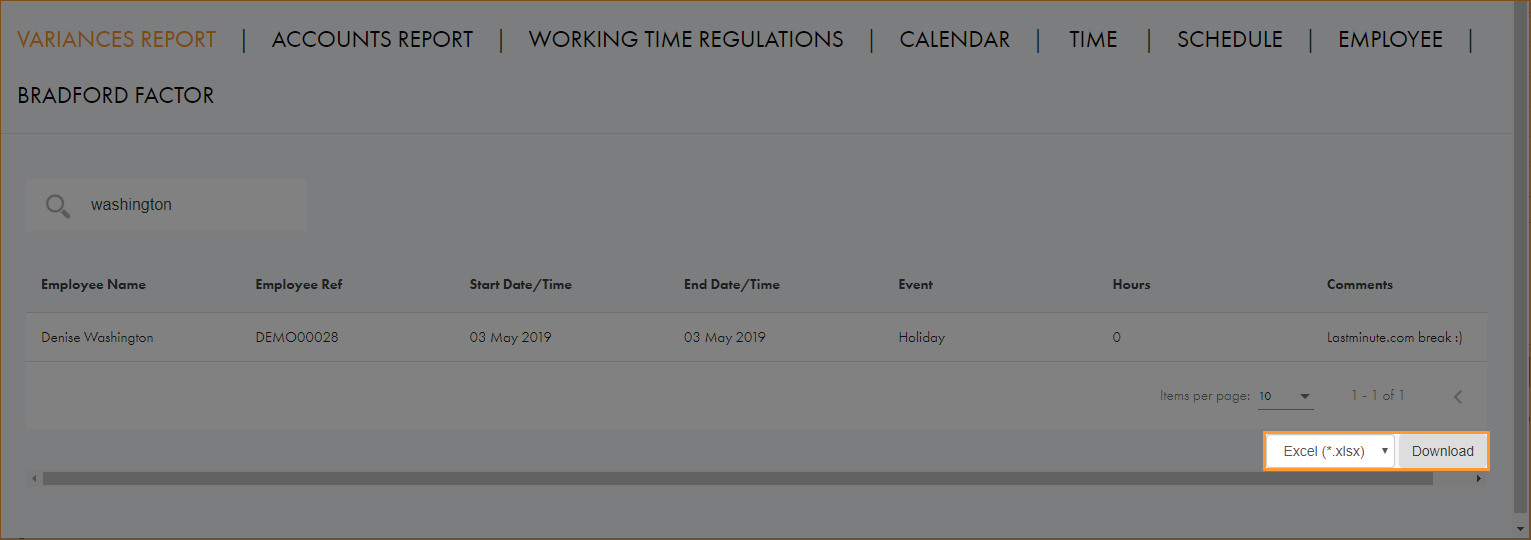
Choose your preferred download format from the dropdown list at the bottom of the screen:
-
Click Download.
-
-
ACCOUNTS REPORT
View annual hours worked compared to remaining annual hours for employees.
Also use this report to track:
-
Hours worked for any time period to assist with payroll calculations.
-
Absences across accounting periods to view time taken over many years.
-
Open the Monitor tab.
-
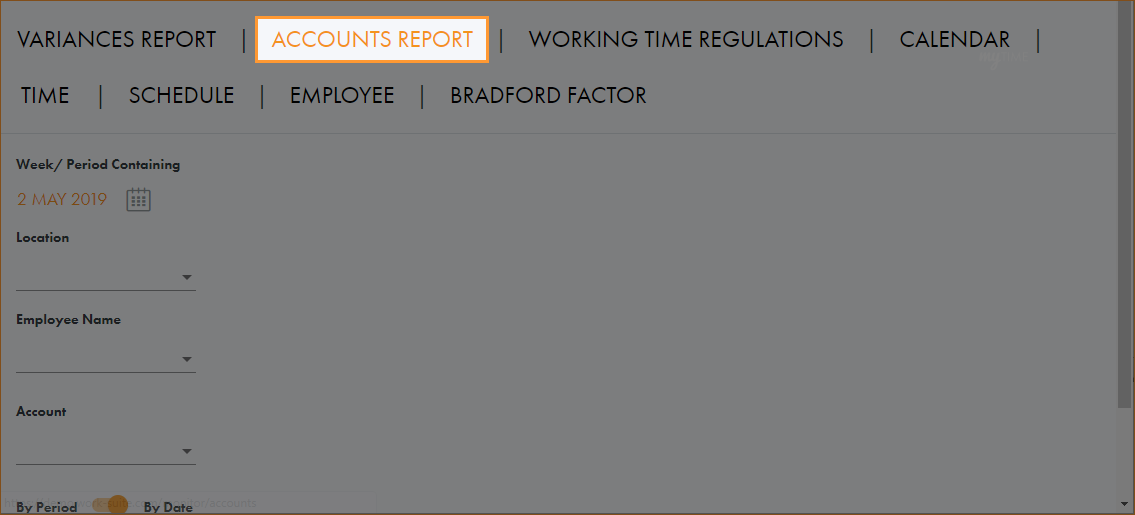
Select ACCOUNTS REPORT:
-
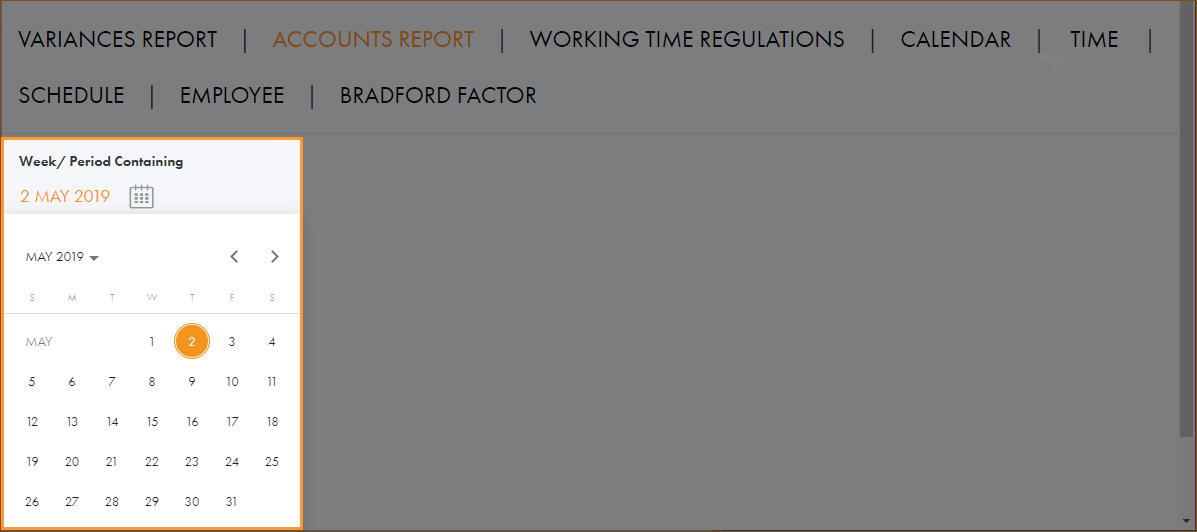
Click on the calendar icon and select the date that you want to report on:
-
Select a Location and Workgroup to report on. This is optional.
-
Select a specific Employee to report on. The list is filtered as you make your selections for Location and Workgroup. This is optional.
-
Select the Account that you want to report on.
-
Use the sliders to select how the report is presented:
-
By Period.
-
By Date. Select an End Date for the report at the top of the screen.
-
Single Week/Period.
-
All Years.
-
-
Click RUN REPORT.
-
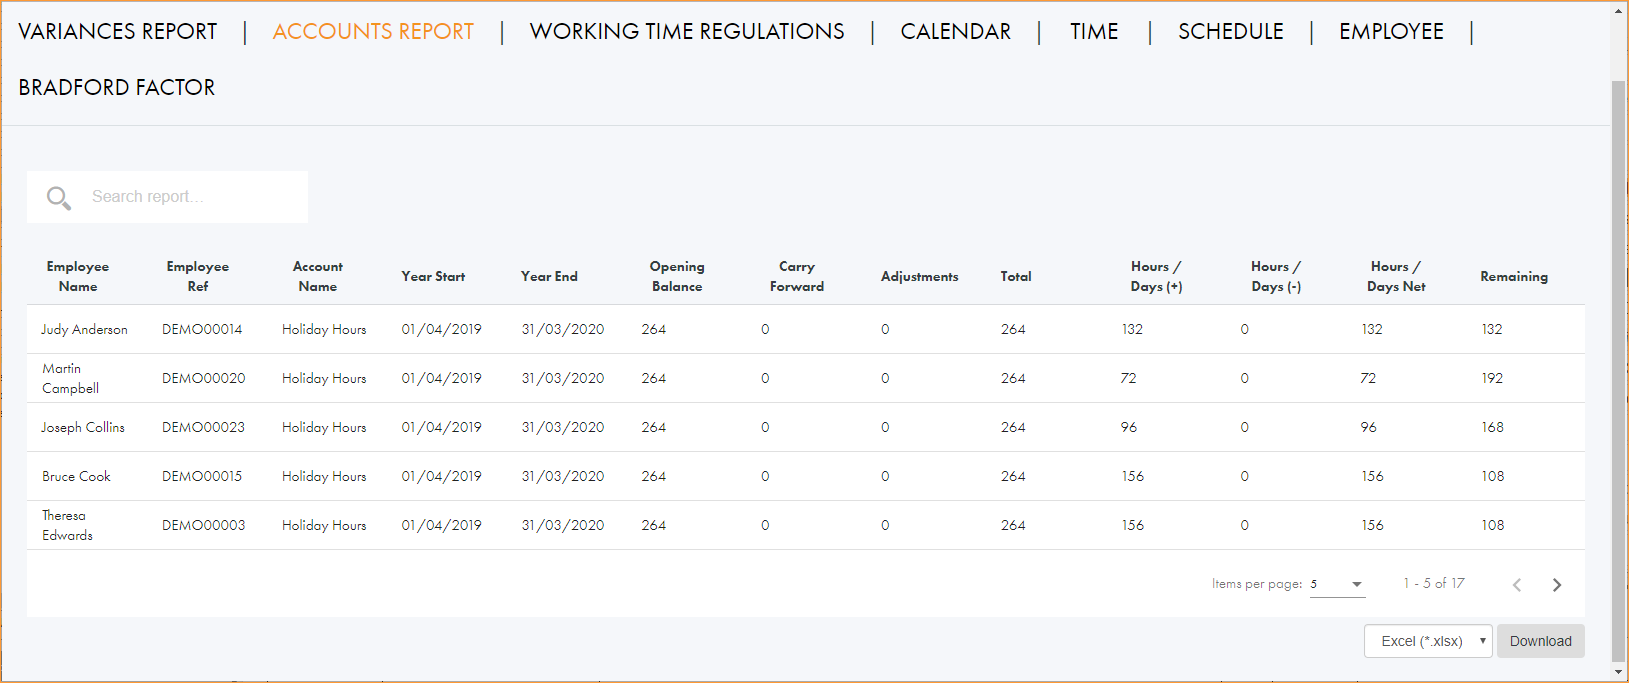
All employees are listed with a snapshot of account details (Annual Hours, Holiday Hours and Sick Days) for the selected day:
-
Use the search field in the top left to search for a specific employee. Start typing in the field to filter the list of employees. The search field recognises any part of employee first name or last name.
-
Click in the column headers to sort the information displayed as required.
-
In addition to Employee Name and Employee Ref, columns display the following information:
Column
Refers to...
Account Name
The selected area in an employee account.
Year Start/End
The start and end period that is being reported.
Opening Balance
The opening balance of hours configured in the employee record.
Carry Forward
Any hours which have been carried over from the previous year.
Adjustments
Any adjustment in hours which have been made for the employee, such as extra holiday hours which have been purchased.
Total
The total number of hours after carried forward hours have been accounted for.
Hours/Days (+)
The number additional hours worked during the accounting period, such as overtime.
Hours/Days (-)
The number of hours not worked during the accounting period, such as time off in lieu of overtime.
Hours/Days Net The total of Hours/Days (+) and Hours/Days (-).
Remaining
The number of hours that need to be scheduled for work or holiday to match the Total figure.
-
Use the navigation tools at the bottom of the screen to determine the number of records that are displayed on the screen and move through the pages of records.
-
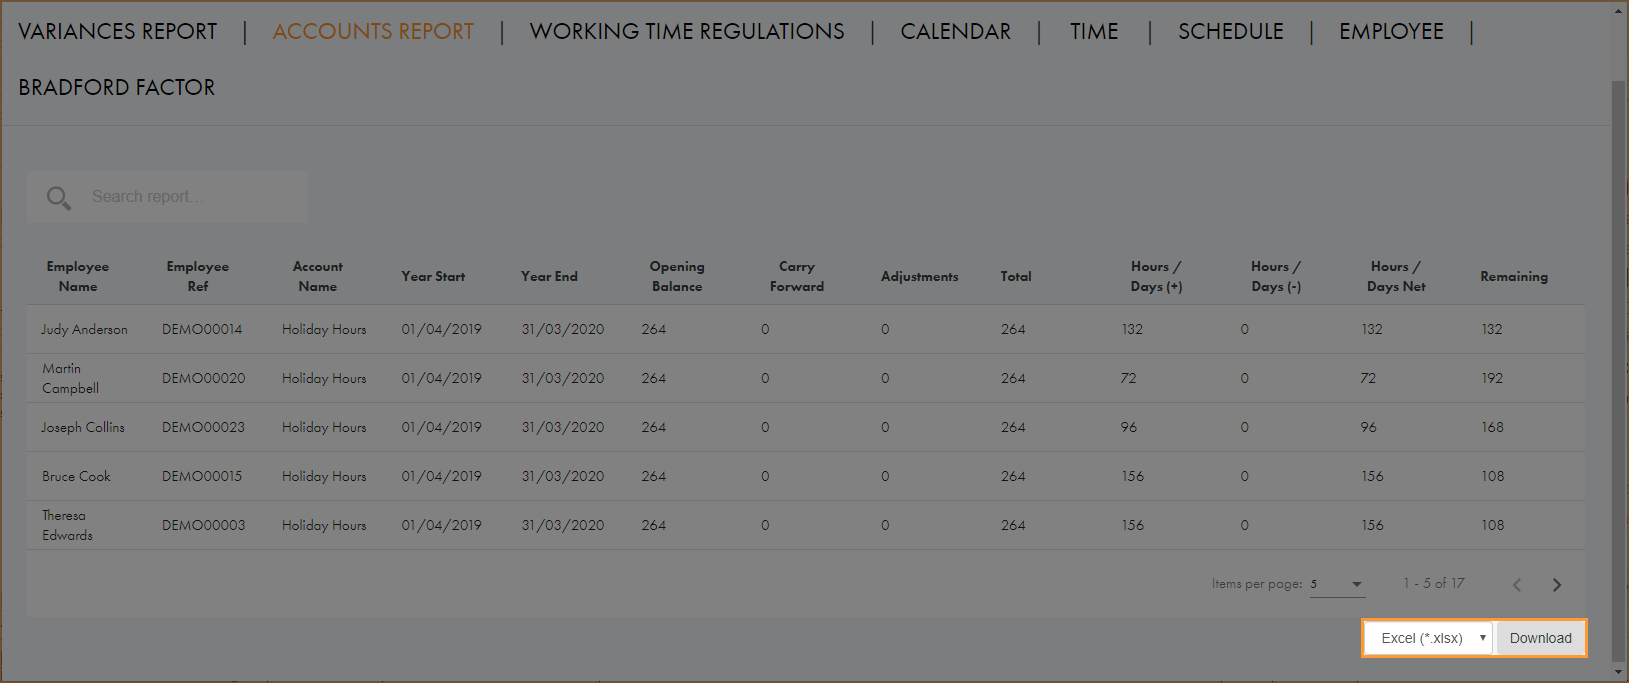
Choose your preferred download format from the dropdown list at the bottom of the screen:
-
Click Download.
-
-
CARRY FORWARD
Identify unused holiday, TOIL and bank/reserve hours at the end of the year. Employees can have their unused hours or days rolled forward into the next year as long as they do not exceed any maximum allowed.
-
Open the Monitor tab.
-
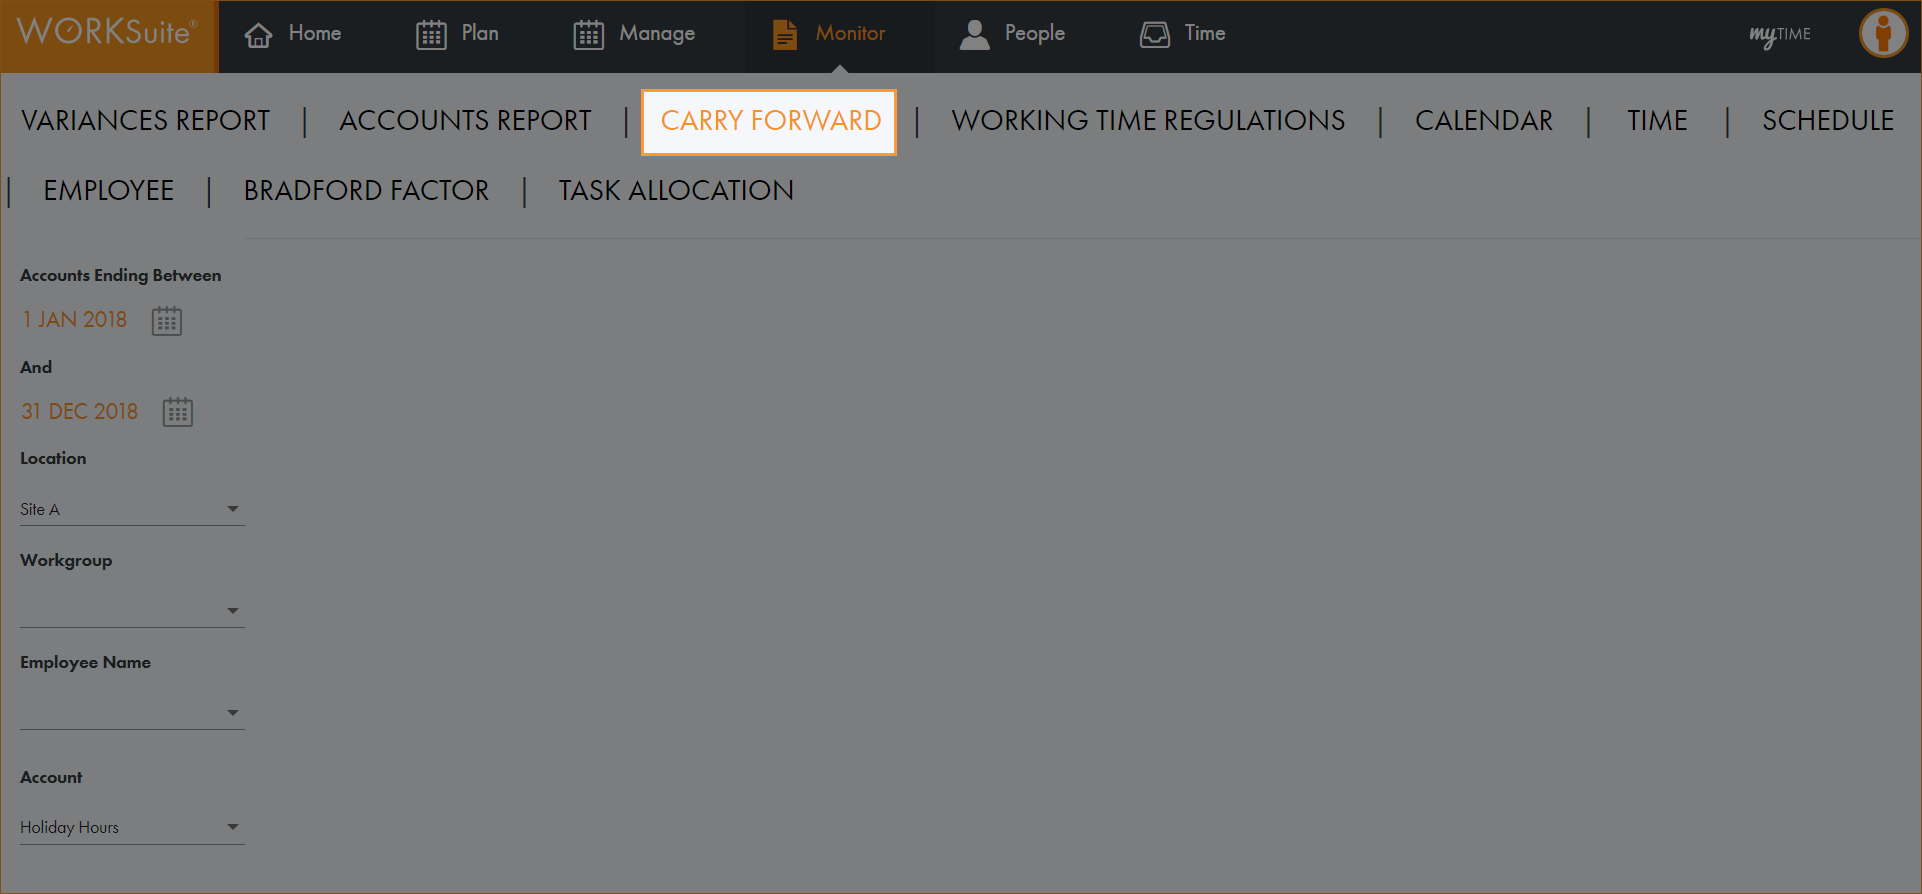
Select CARRY FORWARD:
-
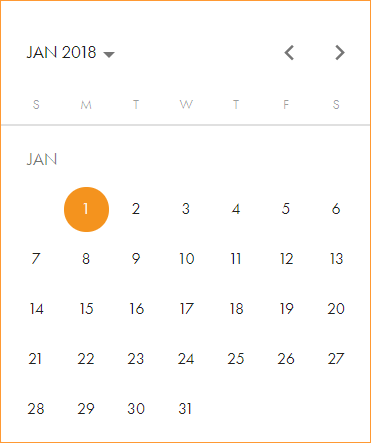
Click on the calendar icons and select the period that you want to report on:
-
Select a Location and Workgroup to report on. This is optional.
-
Select a specific Employee to report on. The list is filtered as you make your selections for Location and Workgroup. This is optional.
-
Select the Account that you want to report on.
-
Click RUN REPORT.
-
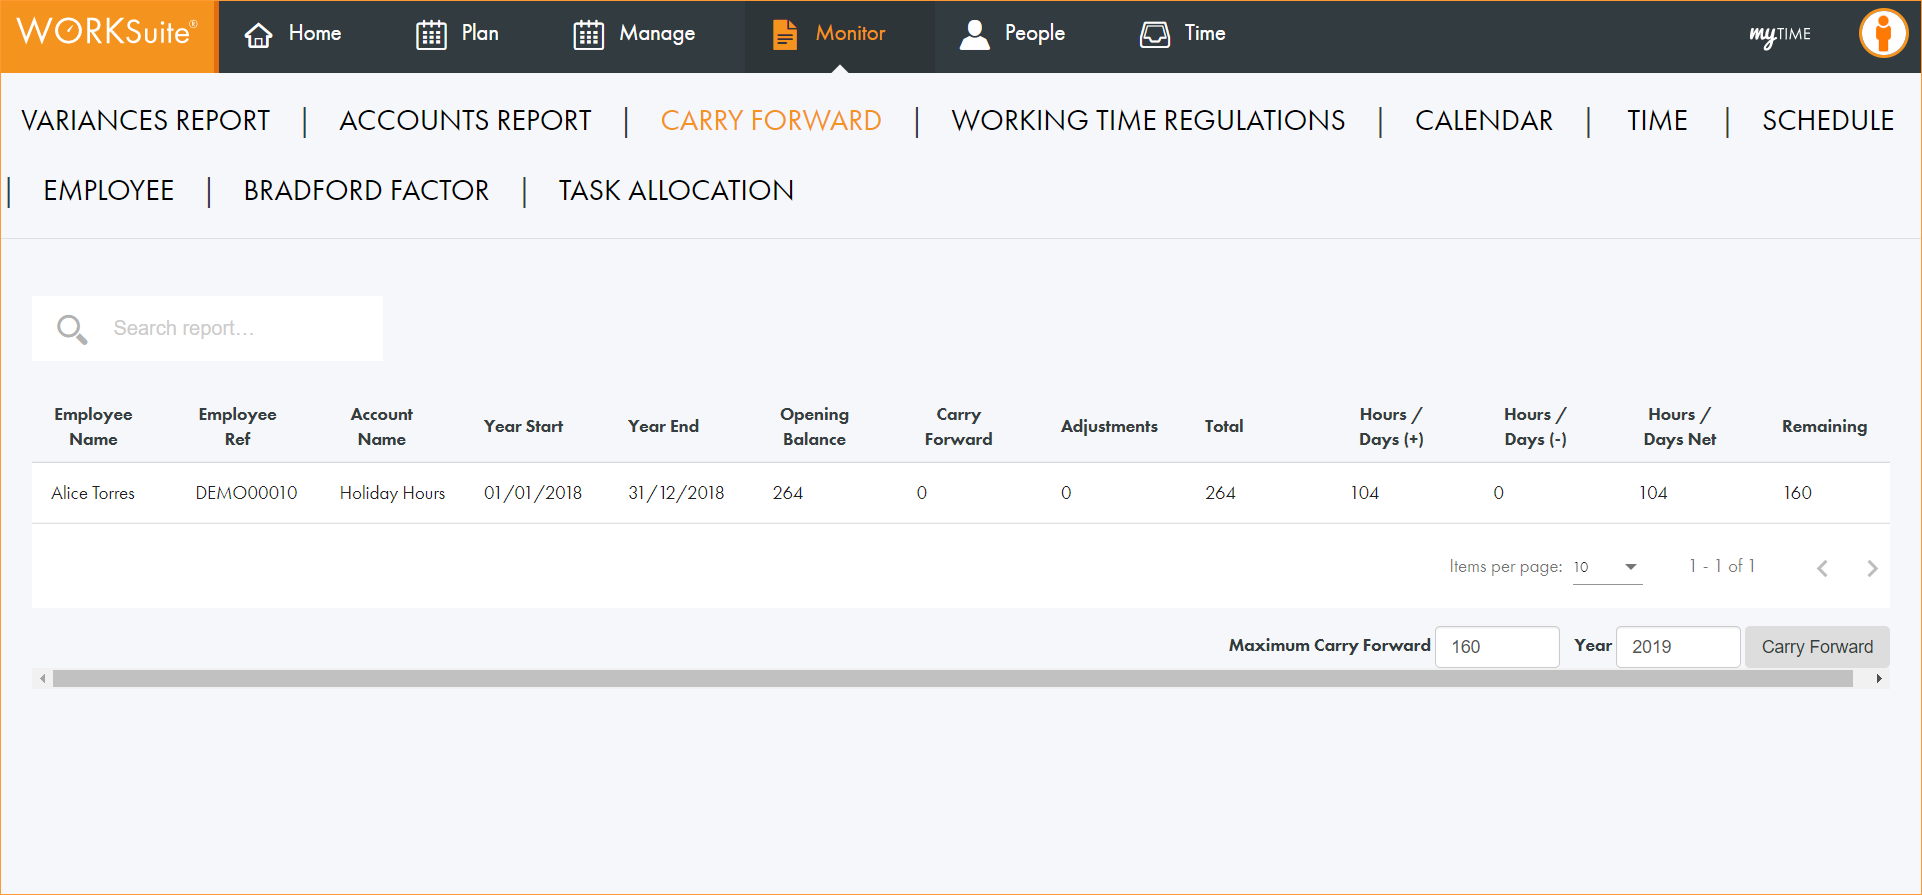
All employees with unused hours within the parameters you have set are listed:
-
Use the search field in the top left to search for a specific employee. Start typing in the field to filter the list of employees. The search field recognises any part of employee first name or last name.
-
Click in the column headers to sort the information displayed as required.
-
In addition to Employee Name and Employee Ref, columns display the following information:
Column
Refers to...
Account Name
The account being reported on.
The start and end date of the reporting period.
Year Start
Year End
Opening Balance
The employee's opening balance of hours/days for this account.
Carry Forward
Any hours/days carried forward from the previous year.
Adjustments
Any adjustments made to the employee's hours/days for this account.
Hours/Days (+)
Hours/Days (-)
Hours/Days Net
Remaining
The amount of hours/days remaining to be taken.
-
Use the navigation tools at the bottom of the screen to determine the number of records that are displayed on the screen and move through the pages of records.
-
In the Maximum Carry Forward field, enter the amount of hours/days from the Remaining figure that are to be carried forward.
-
Select the Year that hours/days are to be carried forward into and click Carry Forward.
-
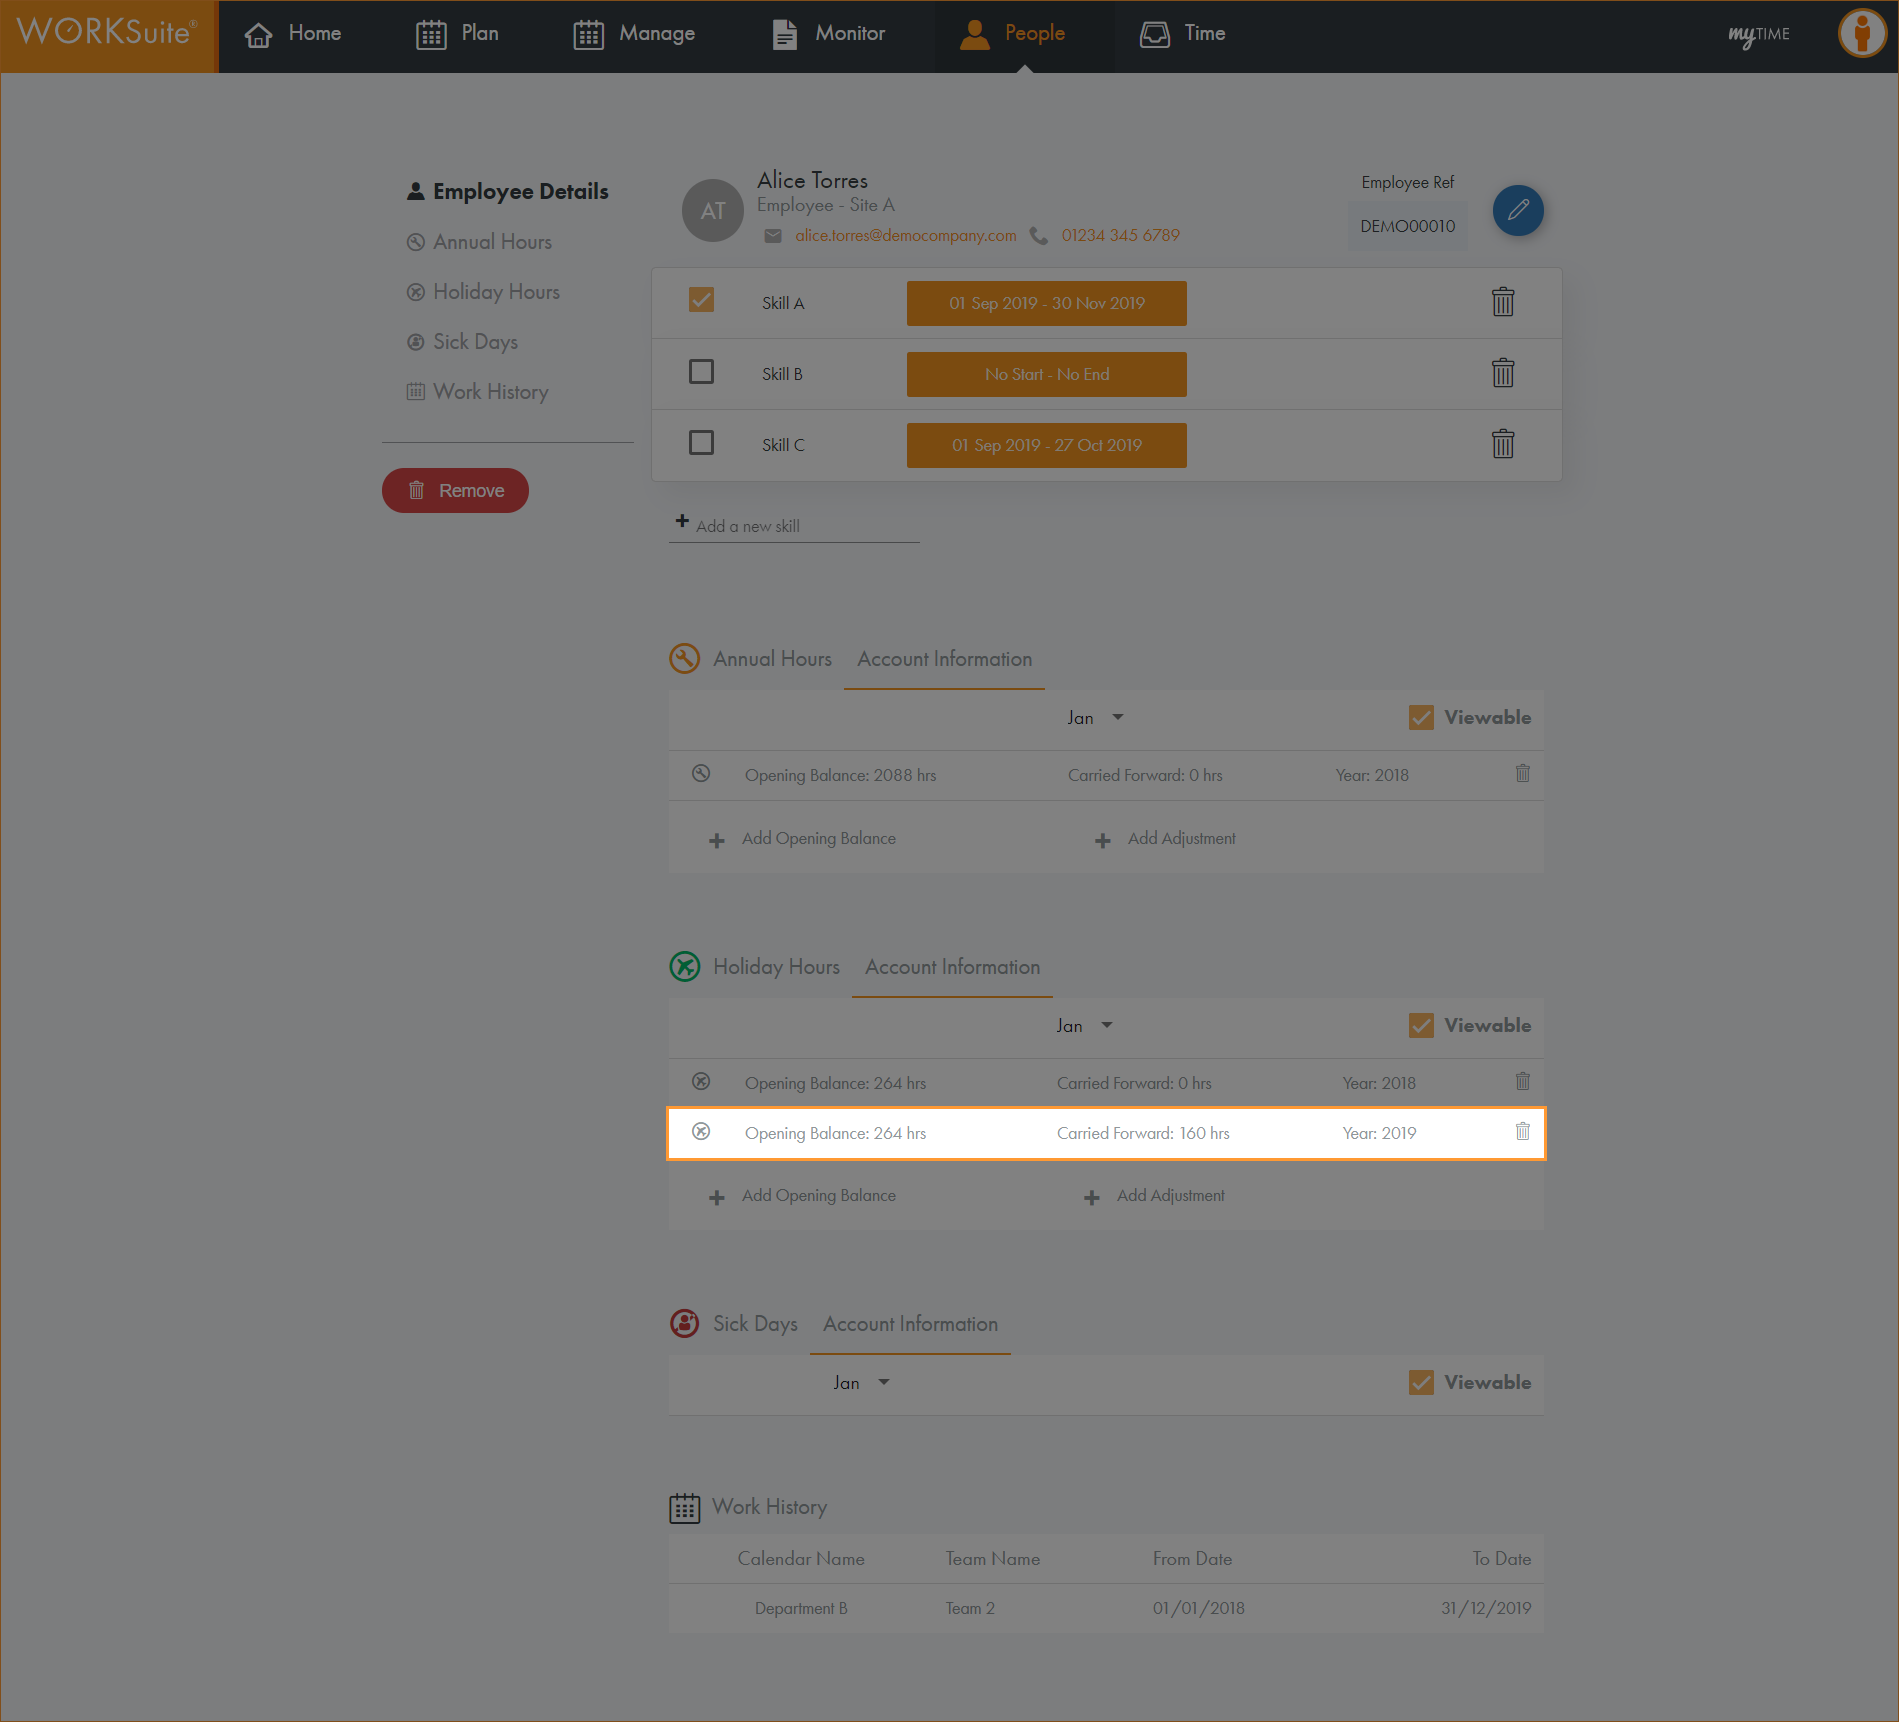
The carried forward hours are now listed in the employee record details:
-
-
WORKING TIME REGULATIONS
Use the reports available to check that employees are working within working time regulations.
-
Open the Monitor tab.
-
Select WORKING TIME REGULATIONS.
-
Three options are available:
-
AVERAGE WEEKLY HOURS
Reports on the average number of hours per week that employees have worked.
-
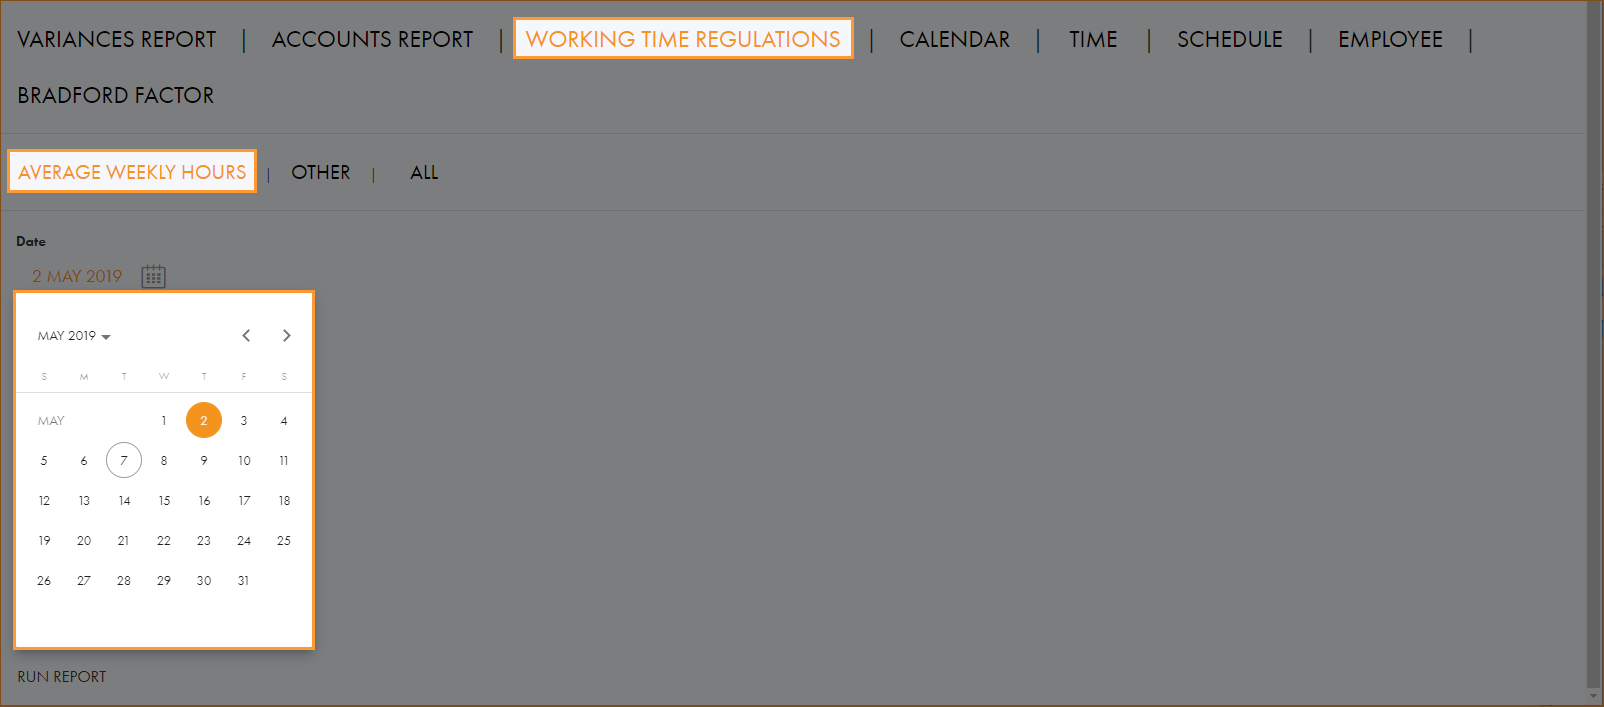
Click on the calendar icon and select the date that you want to report on:
-
Enter the Reference Period (week of the year) that you want to report on.
-
Use the slider to set the report to Look Back at previous shifts or Look Forward to future planned shifts.
-
Select a Location and Workgroup to report on. This is optional.
-
Select a specific Employee to report on. The list is filtered as you make your selections for Location and Workgroup. This is optional.
-
Click RUN REPORT.
-
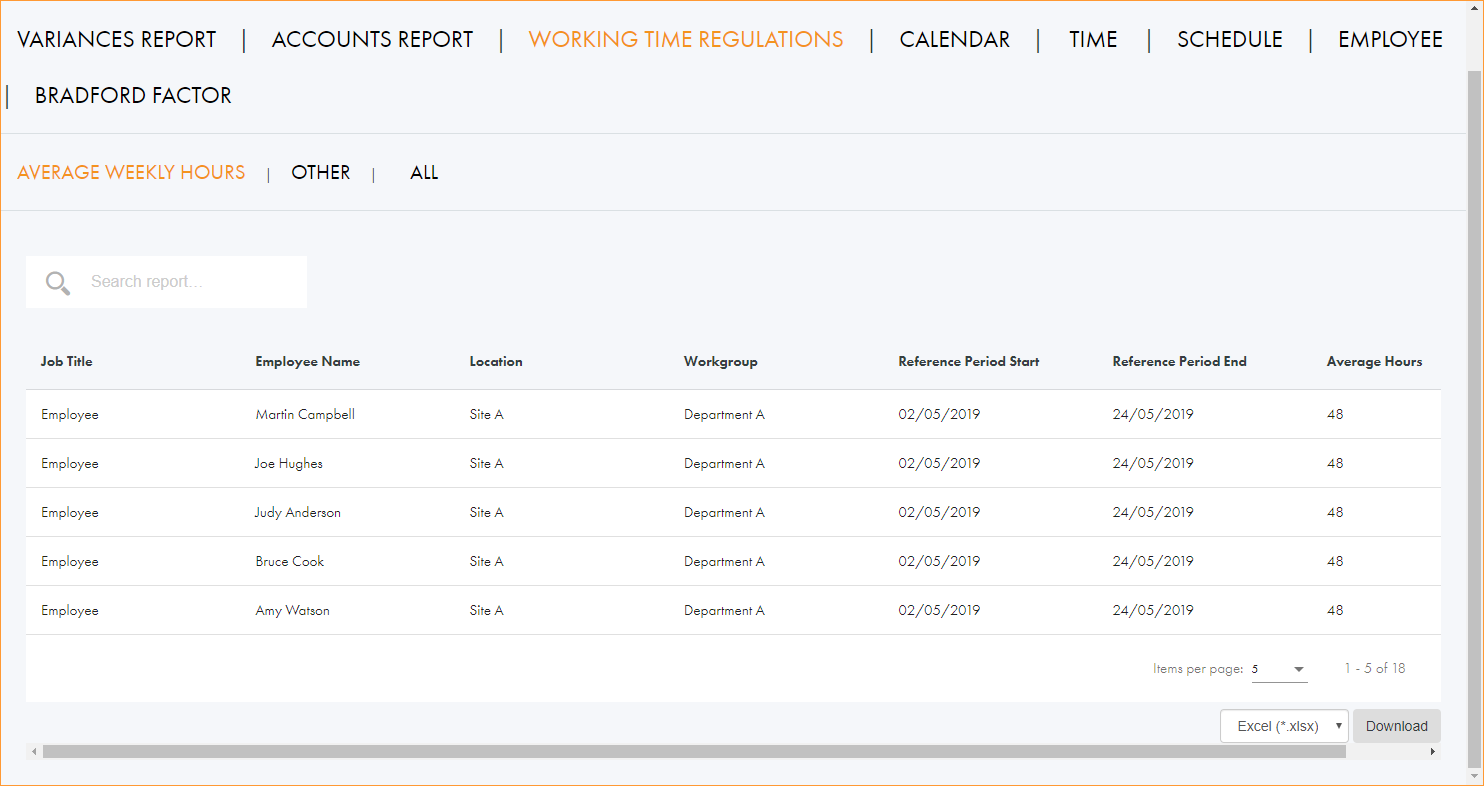
All employees within the parameters you have set are listed with the average number of hours per week they have worked.
-
-
OTHER
Reports on working time regulation breaches.
-
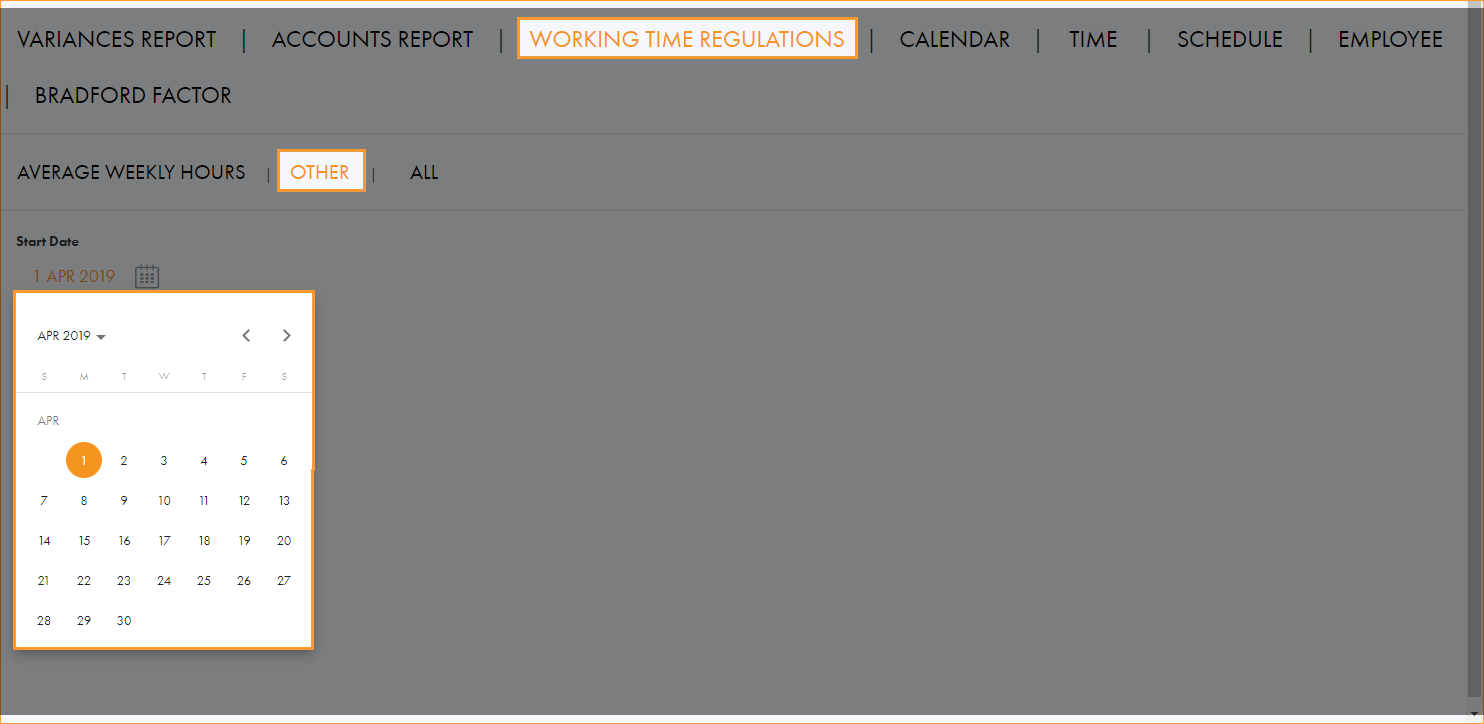
Click on the calendar icons and select the dates that you want to report on:
-
Select a Location and Workgroup to report on. This is optional.
-
Select a specific Employee to report on. The list is filtered as you make your selections for Location and Workgroup. This is optional.
-
Click RUN REPORT.
-
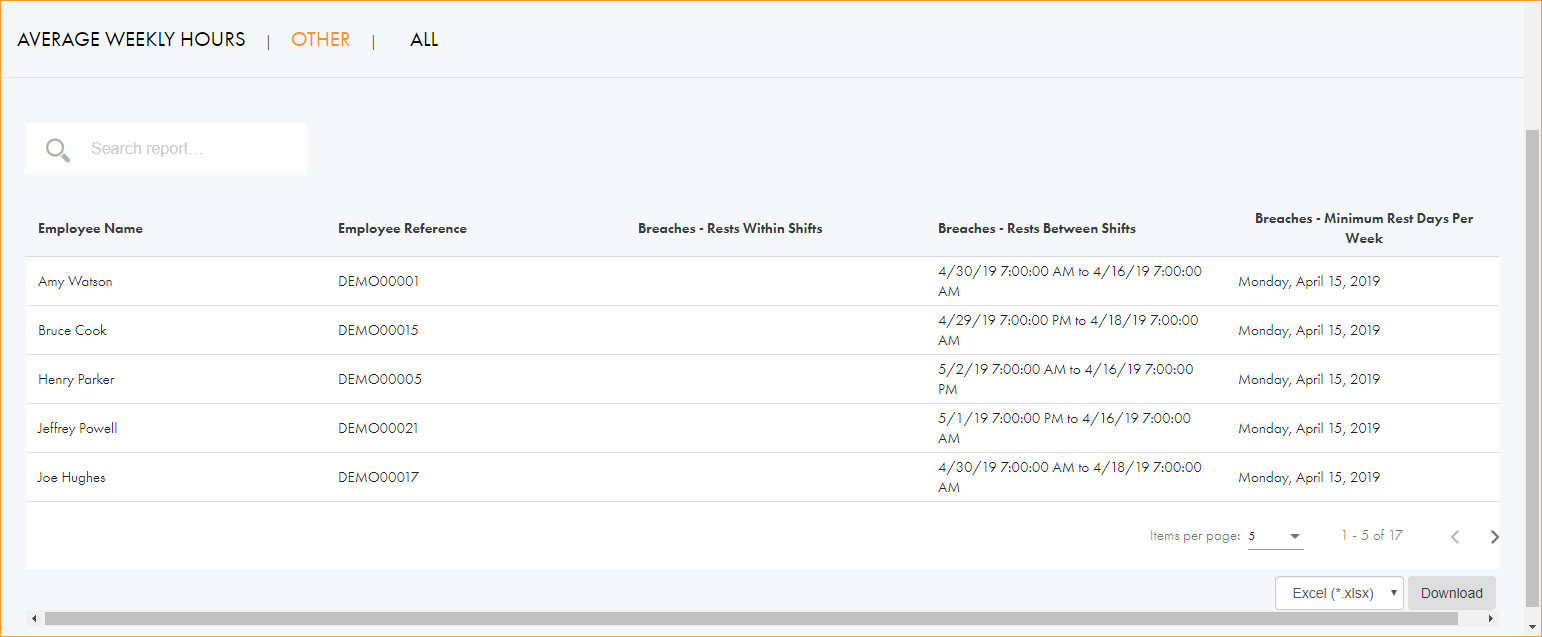
All employees within the parameters you have set are listed with their working time regulation breaches:
-
-
ALL
Reports on both the average number of hours worked and regulation breaches.
-
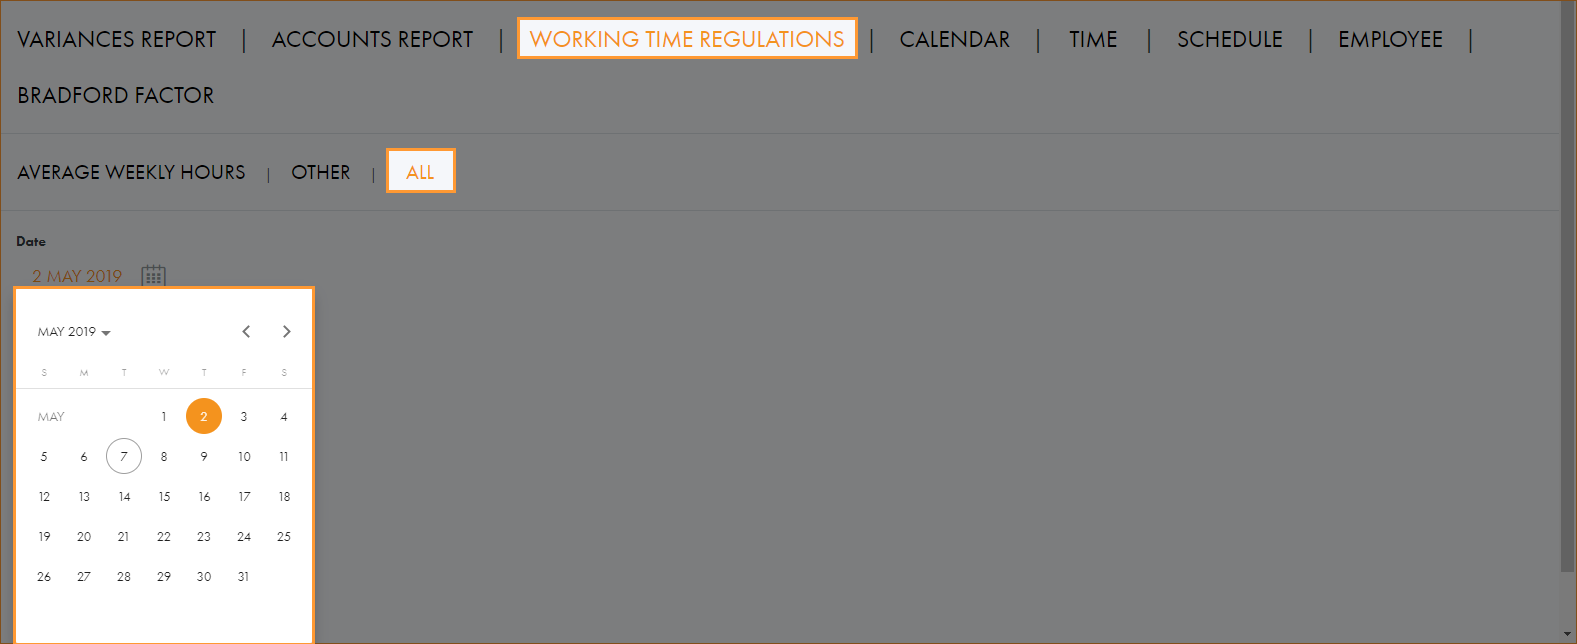
Click on the calendar icon and select the date that you want to report on:
-
Enter the Reference Period (week of the year) that you want to report on.
-
Use the slider to set the report to Look Back at previous shifts or Look Forward to future planned shifts.
-
Select a Location and Workgroup to report on. This is optional.
-
Select a specific Employee to report on. The list is filtered as you make your selections for Location and Workgroup. This is optional.
-
Click RUN REPORT.
-
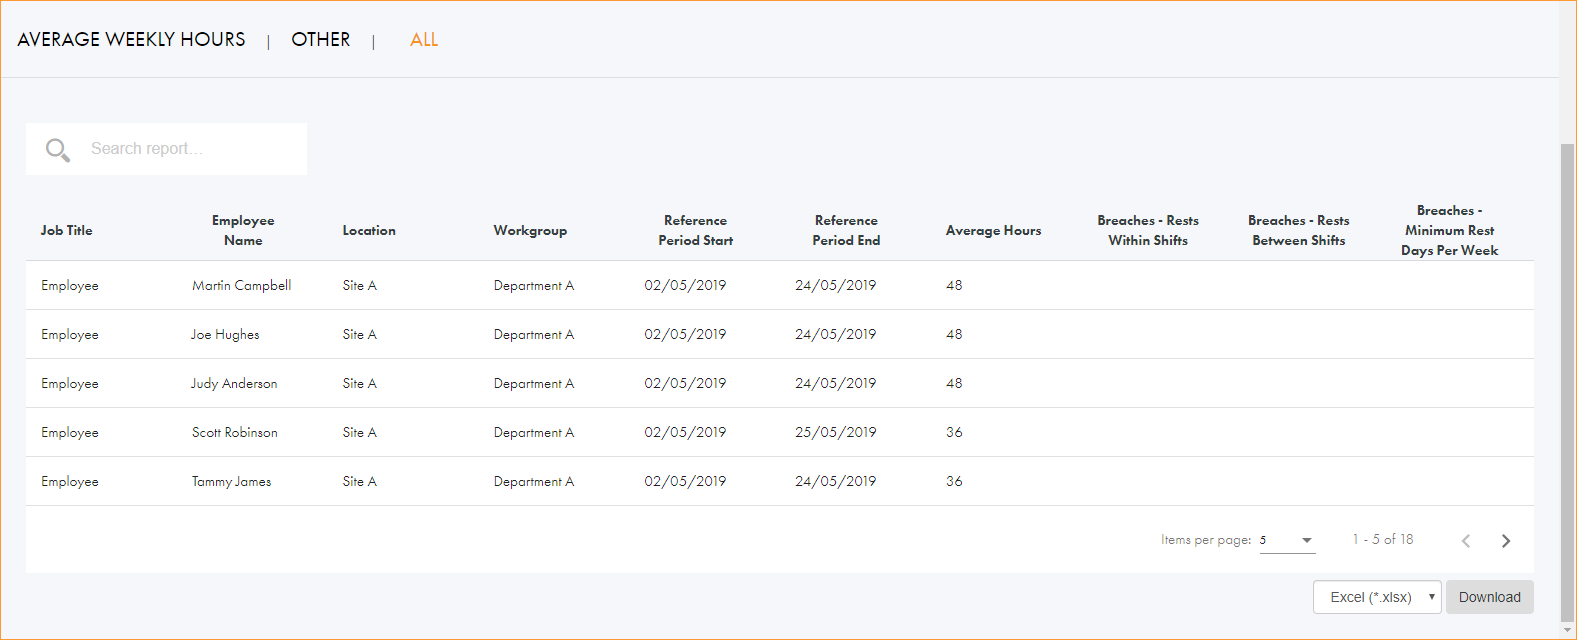
All employees within the parameters you have set are listed with the average number of hours per week they have worked and any working time regulation breaches:
-
-
-
Use the search field in the top left to search for a specific employee. Start typing in the field to filter the list of employees. The search field recognises any part of employee first name or last name.
-
Click in the column headers to sort the information displayed as required.
-
Use the navigation tools at the bottom of the screen to determine the number of records that are displayed on the screen and move through the pages of records.
-
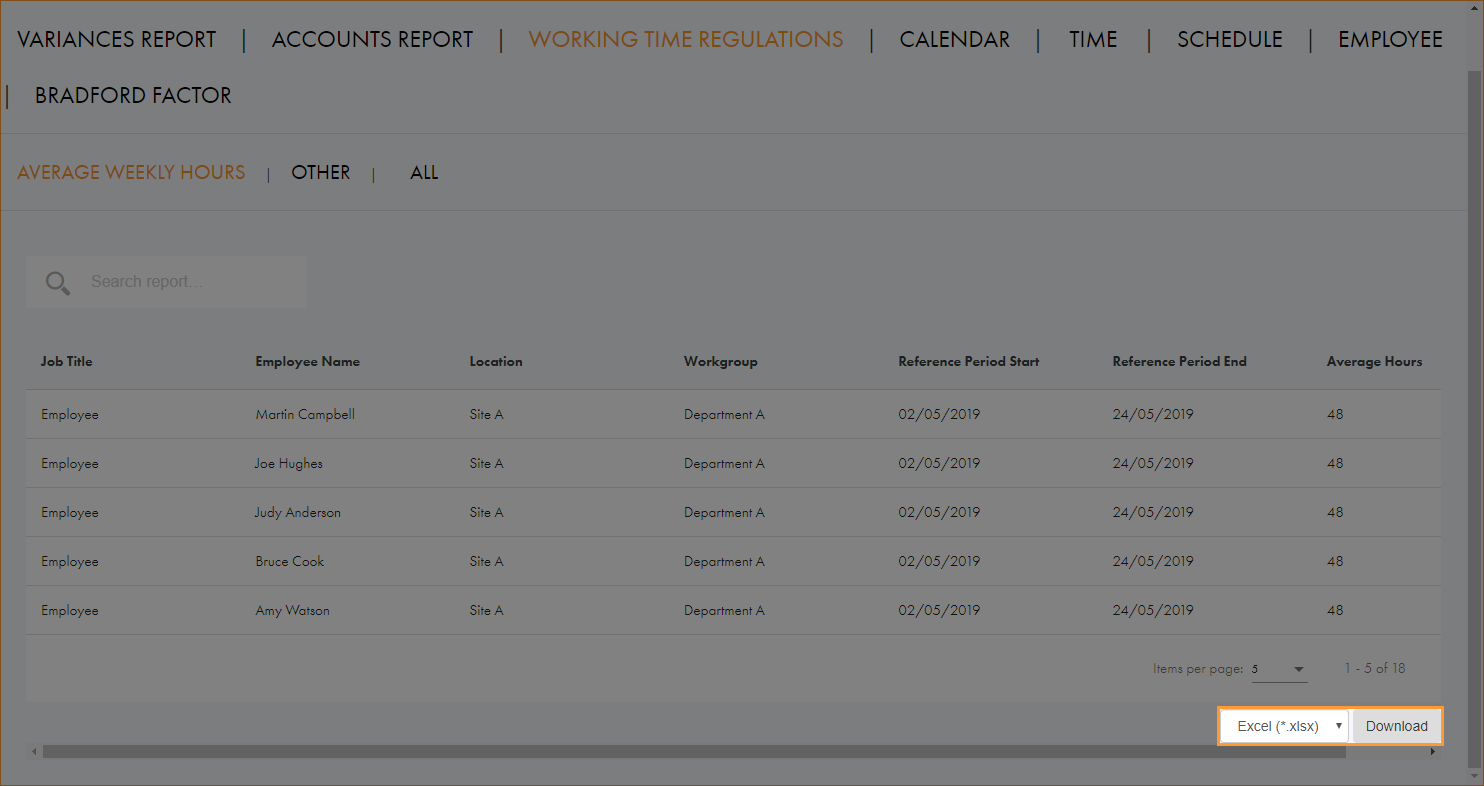
Choose your preferred download format from the dropdown list at the bottom of the screen:
-
Click Download.
-
-
CALENDAR
Generate a printable report of each employee's work schedule.
-
Open the Monitor tab.
-
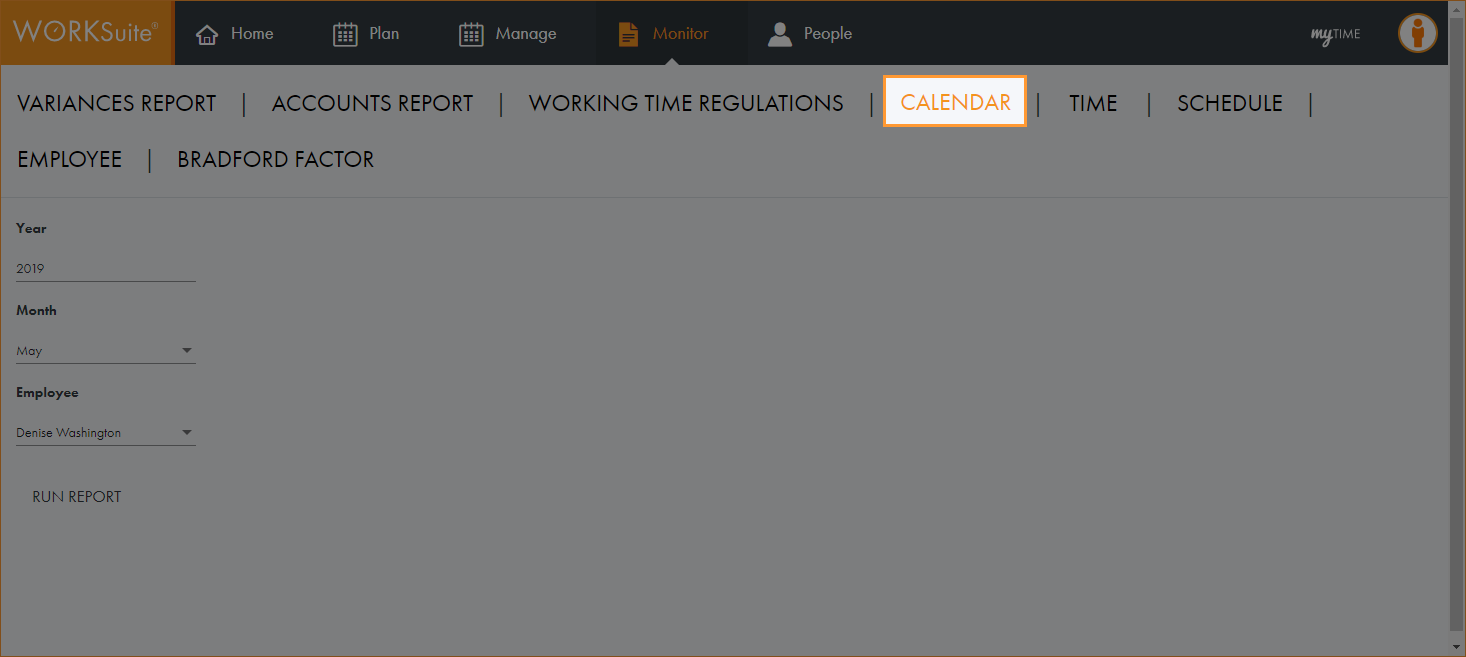
Select CALENDAR:
-
Use the dropdowns to select the Year, Month and Employee that you want to report on.
-
Click RUN REPORT.
-
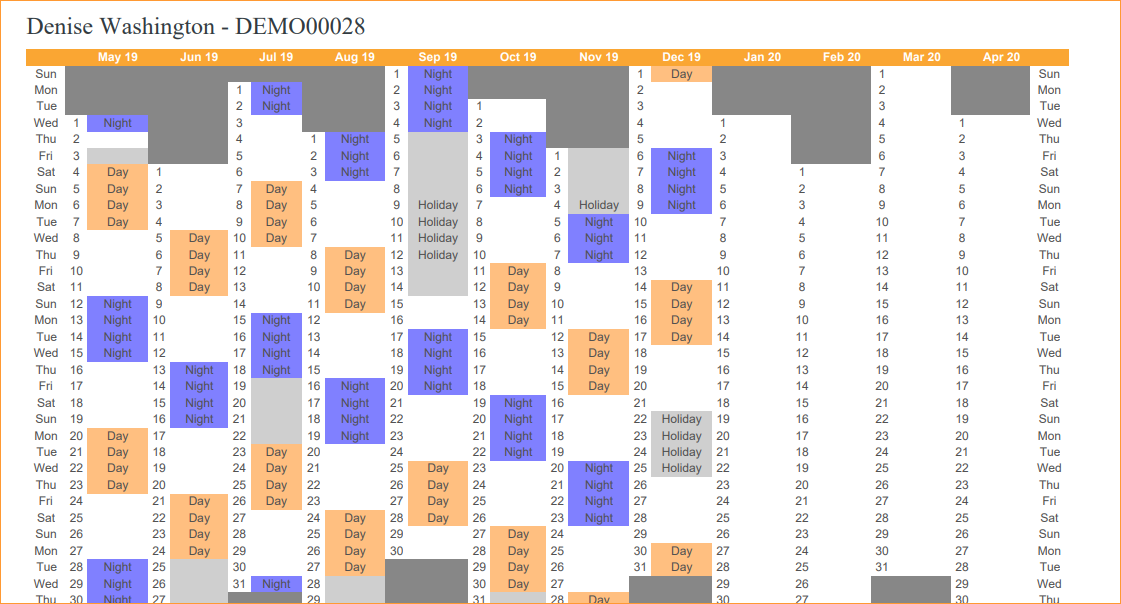
Select the Click to download button to create the report in PDF:
-
Print or save the report as required.
-
-
TIME
Review employee shifts and working hours.
-
Open the Monitor tab.
-
Select TIME:
-
Two options are available:
-
CURRENT
View all employees who are currently scheduled to be in work or that are currently clocked in to work. Any non-adherence to shift start and end times is highlighted showing any employees who are early, late or non-attending.
-
Select a Location and Workgroup to report on.
-
Select a specific Employee to report on. The list is filtered as you make your selections for Location and Workgroup.
-
Click RUN REPORT.
-
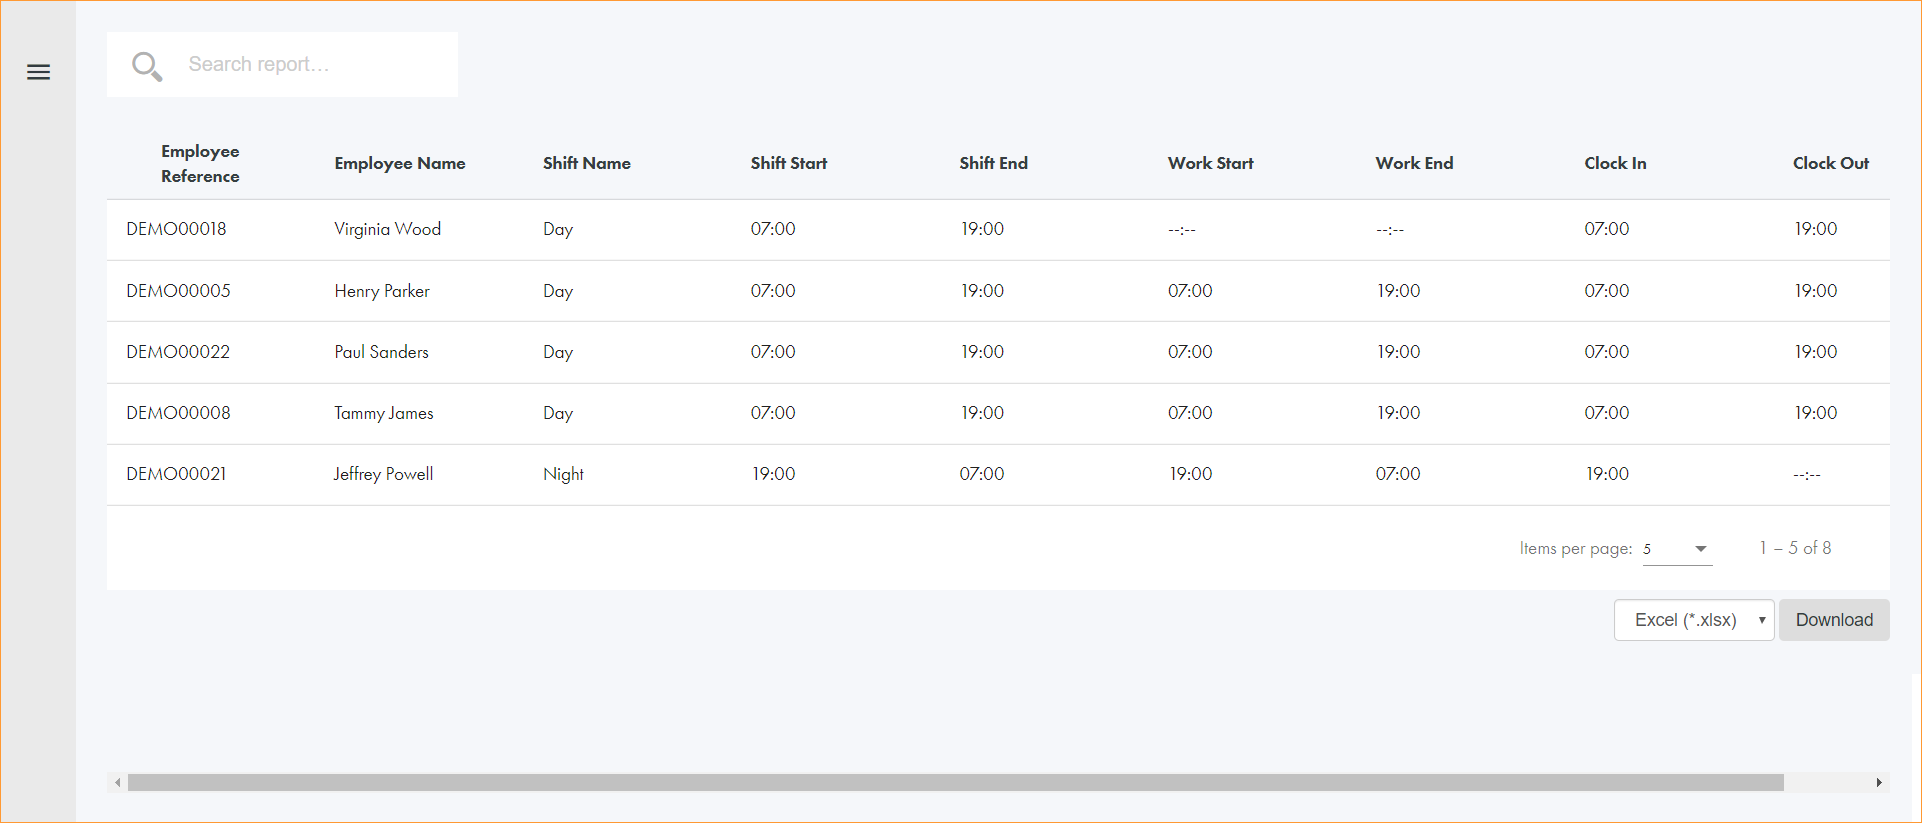
Employees are listed in the report in order of work start. Work start is the start of shift adjusted for any variances; this means that the employee will be in work later or earlier than the start of shift. For example, a part day holiday at the beginning of the day or additional hours at the beginning of the shift:
-
Use the search field in the top left to search for a specific employee. Start typing in the field to filter the list of employees. The search field recognises any part of employee first name or last name.
-
Click in the column headers to sort the information displayed as required.
-
Use the navigation tools at the bottom of the screen to determine the number of records that are displayed on the screen and move through the pages of records.
-
Choose your preferred download format from the dropdown list at the bottom of the screen.
-
Click Download.
-
-
HISTORICAL
View all recorded shift start and end times from clocking data. This enables the analysis of hours worked versus hours scheduled to work highlighting any non-adherence to shift start and end times.
-
Click on the calendar icons and select the dates that you want to report on.
-
Select a Location and Workgroup to report on. This is optional.
-
Select a specific Employee to report on. The list is filtered as you make your selections for Location and Workgroup.
-
Click RUN REPORT.
-
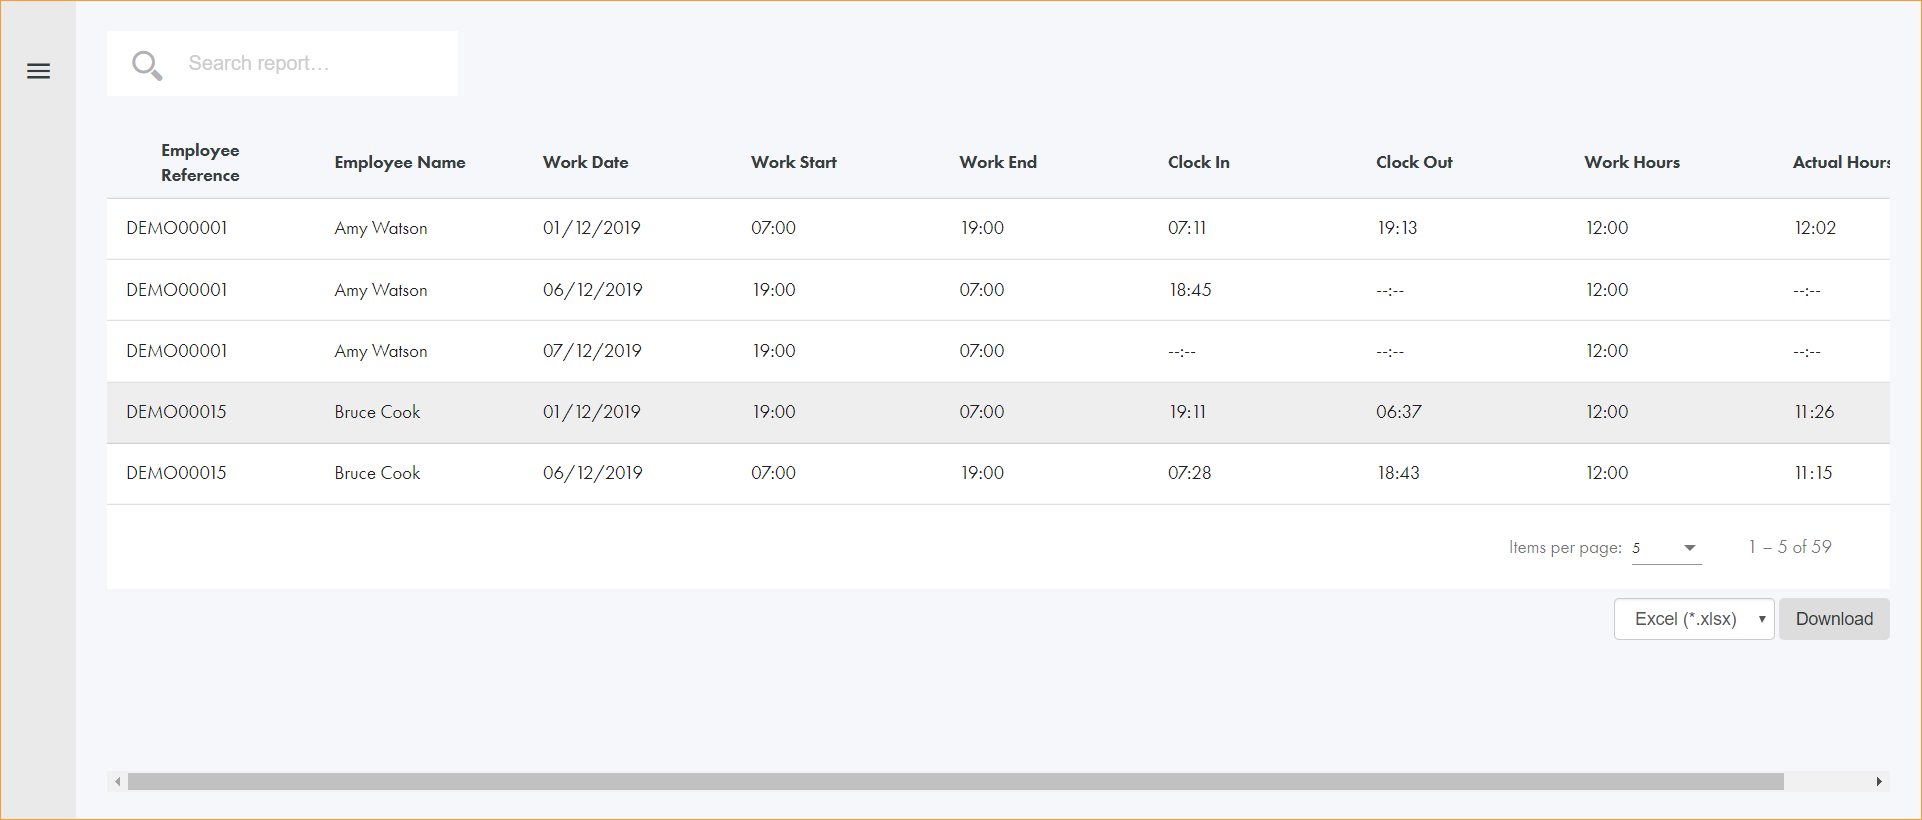
All employees within the parameters you have set are listed with their shifts and work hours:
-
Use the search field in the top left to search for a specific employee. Start typing in the field to filter the list of employees. The search field recognises any part of employee first name or last name.
-
Click in the column headers to sort the information displayed as required.
-
Use the navigation tools at the bottom of the screen to determine the number of records that are displayed on the screen and move through the pages of records.
-
Choose your preferred download format from the dropdown list at the bottom of the screen.
-
Click Download.
-
-
-
-
SCHEDULE
Review shift details, including worked hours and variance reasons.
-
Open the Monitor tab.
-
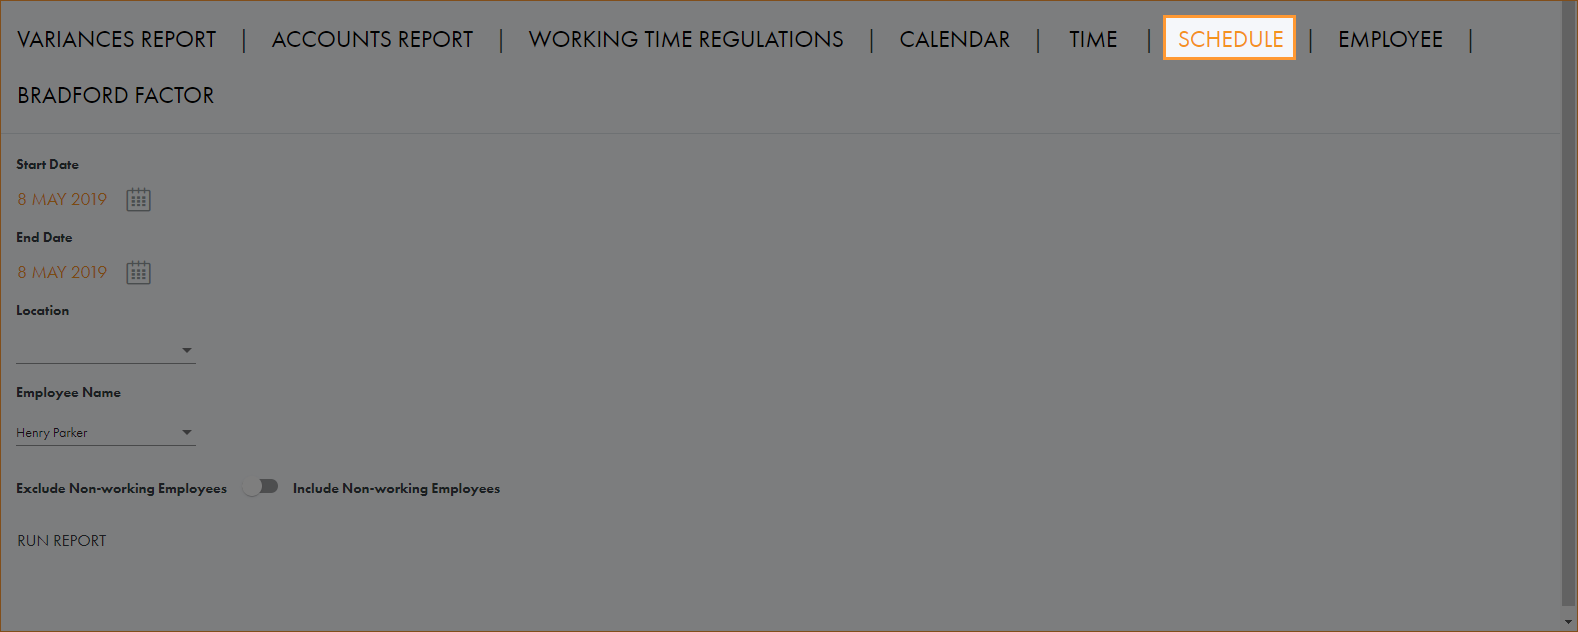
Select SCHEDULE:
-
Click on the calendar icons and select the period that you want to report on.
-
Select a Location and Workgroup to report on. This is optional.
-
Select a specific Employee to report on. The list is filtered as you make your selections for Location and Workgroup. This is optional.
-
Use the slider to choose whether to exclude or include any employees who are not scheduled to work for the selected time period.
-
Click RUN REPORT.
-
All employees within the parameters you have set are listed with their shifts, working hours and variances:
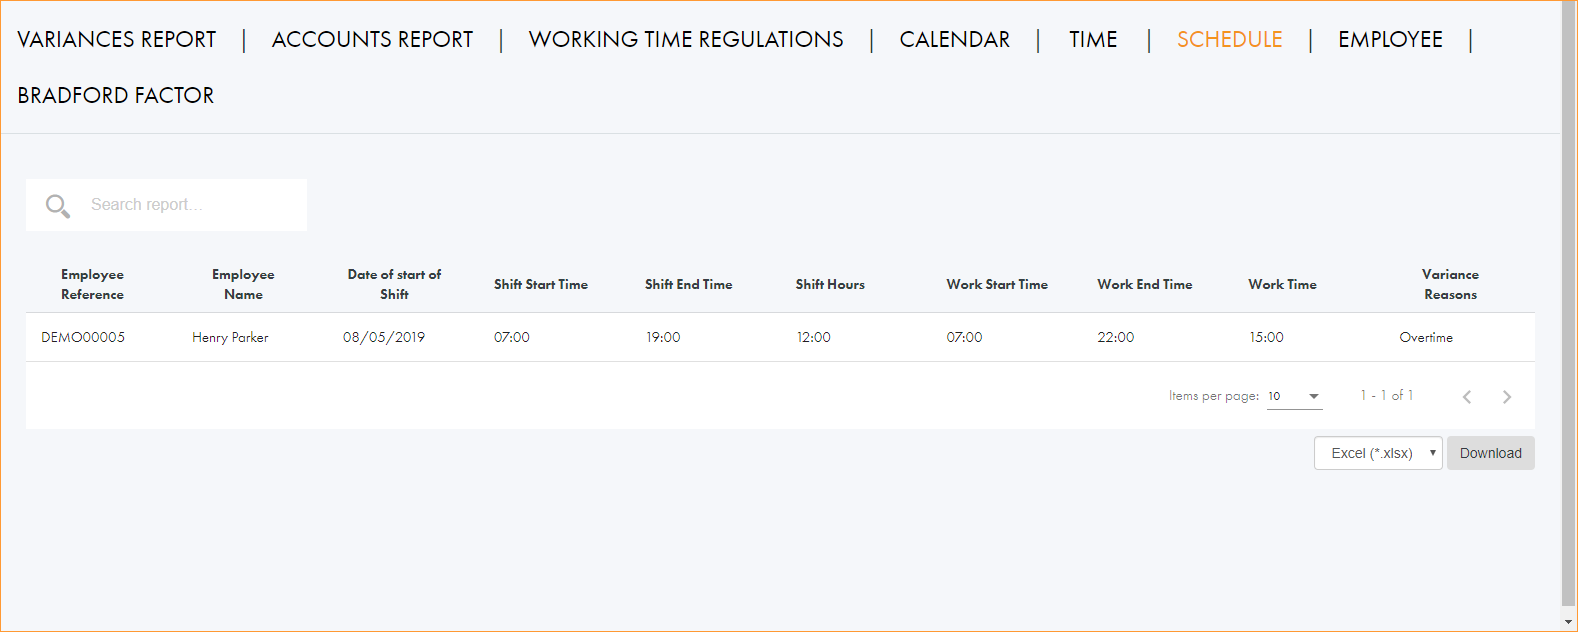
-
Use the search field in the top left to search for a specific employee. Start typing in the field to filter the list of employees. The search field recognises any part of employee first name or last name.
-
Click in the column headers to sort the information displayed as required.
-
Use the navigation tools at the bottom of the screen to determine the number of records that are displayed on the screen and move through the pages of records.
-
Choose your preferred download format from the dropdown list at the bottom of the screen.
-
Click Download.
-
-
EMPLOYEE
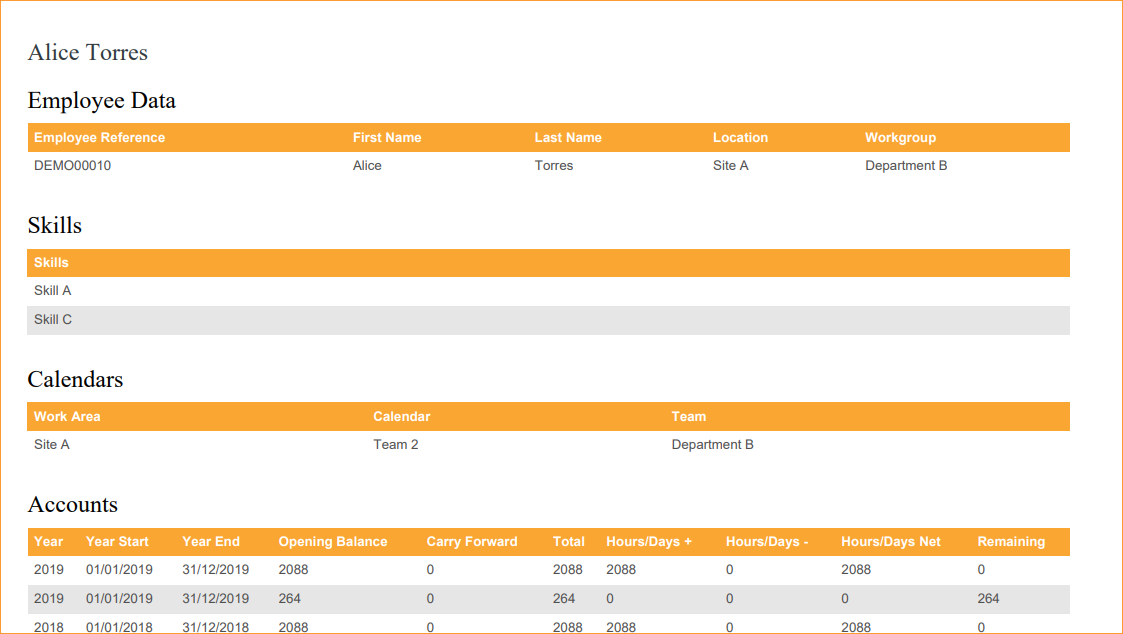
Provides a complete breakdown of employee data. Including skills, accounts, variance and shifts.
-
Open the Monitor tab.
-
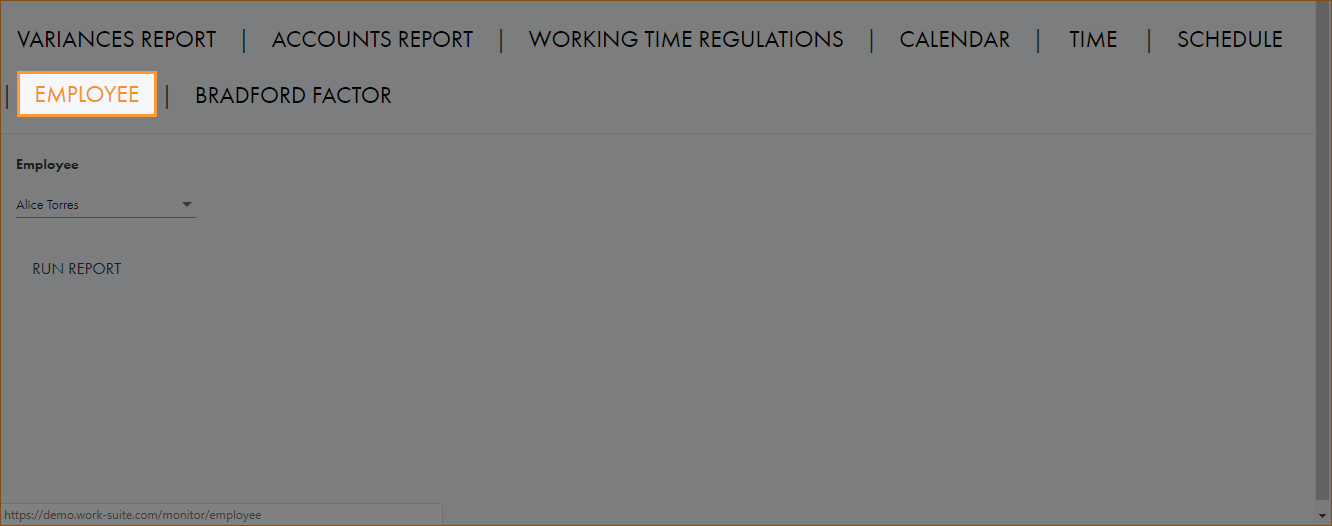
Select EMPLOYEE:
-
Select the employee that you want to report on.
-
Click RUN REPORT.
-
Select the Click to download button to create the report in PDF:
-
Print or save the report as required.
-
-
BRADFORD FACTOR
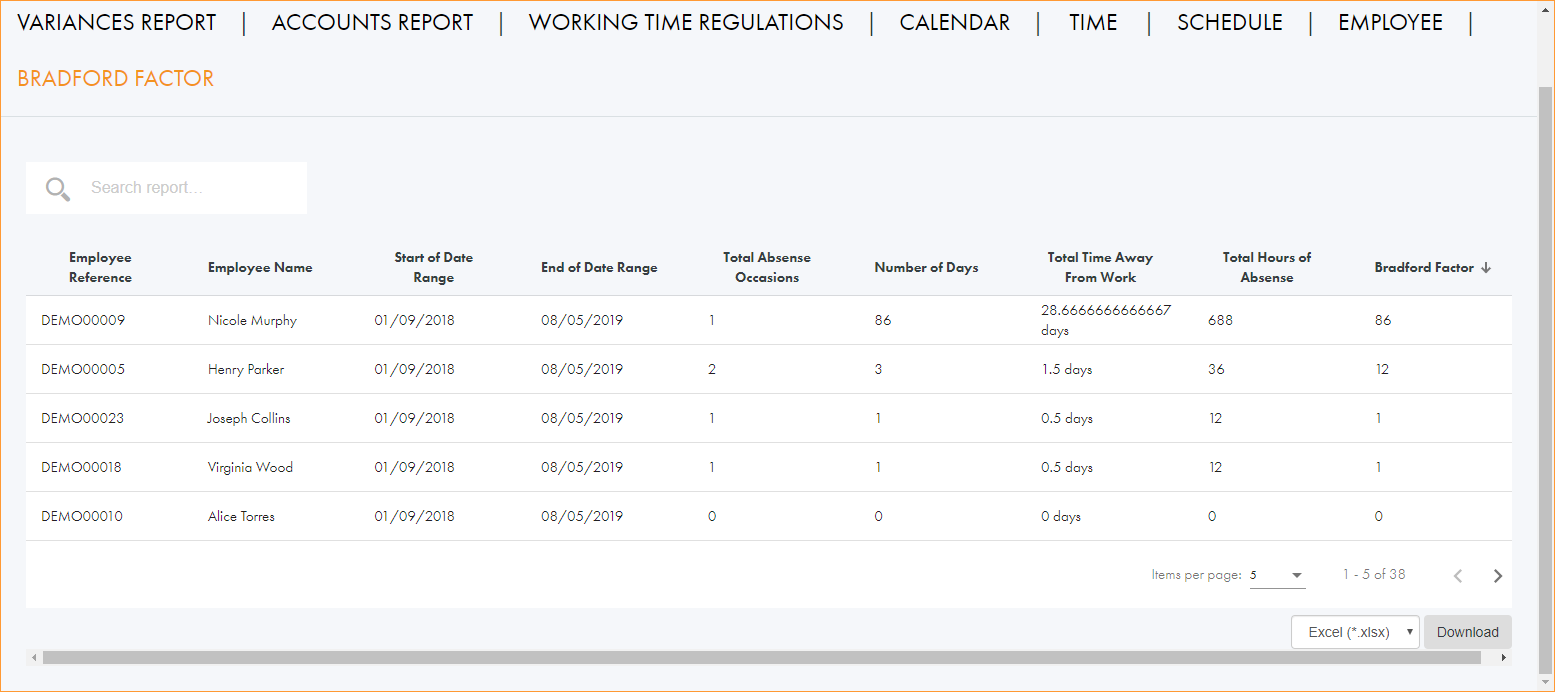
This report tracks employee absence and presents each employee's Bradford Factor score.
The Bradford Factor is calculated using the Bradford Formula S2 x D = B.
-
S = total number of separate absences by an individual.
-
D = total number of days of absence of that individual.
-
B = Bradford Factor score.
-
Open the Monitor tab.
-
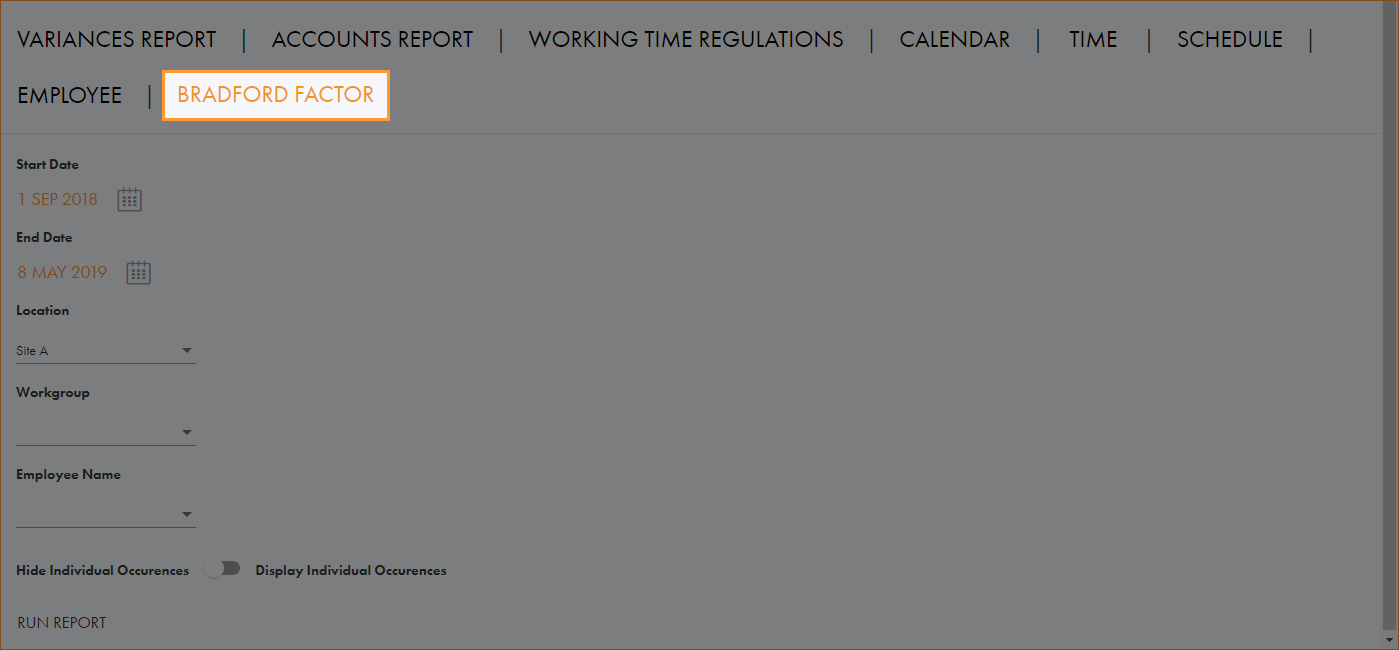
Select BRADFORD FACTOR:
-
Click on the calendar icons and select the period that you want to report on.
-
Select a Location and Workgroup to report on. This is optional.
-
Select a specific Employee to report on. The list is filtered as you make your selections for Location and Workgroup. This is optional.
-
Use the slider to choose whether to hide or display individual occurrences of absence.
-
Click RUN REPORT.
-
All employees within the parameters you have set are listed with their absences and Bradford Factor score:
-
Use the search field in the top left to search for a specific employee. Start typing in the field to filter the list of employees. The search field recognises any part of employee first name or last name.
-
Click in the column headers to sort the information displayed as required.
-
Use the navigation tools at the bottom of the screen to determine the number of records that are displayed on the screen and move through the pages of records.
-
Choose your preferred download format from the dropdown list at the bottom of the screen.
-
Click Download.
-
-
TASK ALLOCATION
View information on which tasks have been worked on by which employees for any specified date range.
-
Open the Monitor tab.
-
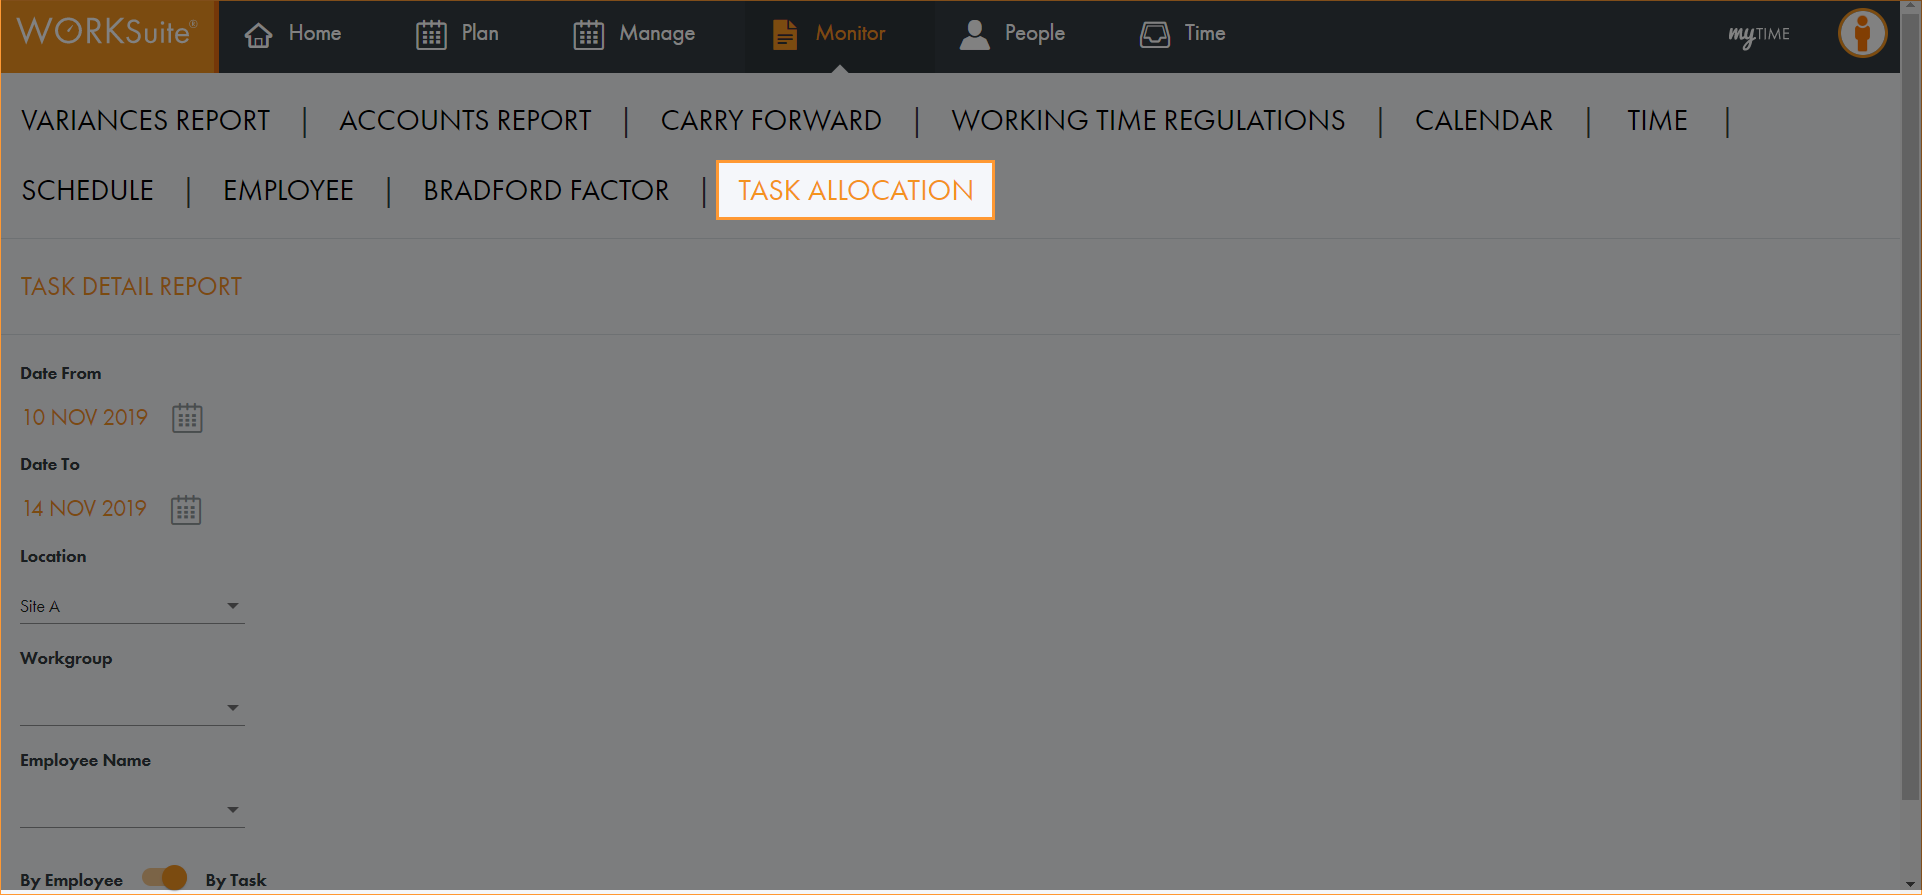
Select TASK ALLOCATION:
-
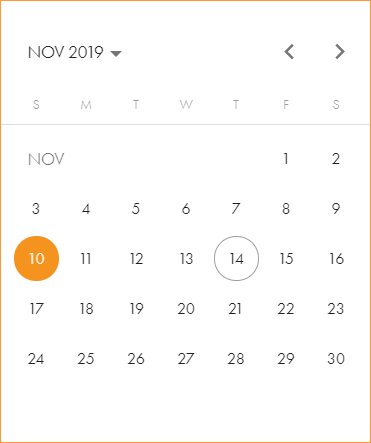
Click on the calendar icons and select the period that you want to report on:
-
Select a Location and Workgroup to report on. This is optional.
-
Select specific Employees to report on or click Ctrl+A to select all employees. The list is filtered as you make your selections for Location and Workgroup. You must make a selection here for the report to work as expected.
-
Choose to report:
-
By Employee. See all the tasks your employees have been working on.
or
-
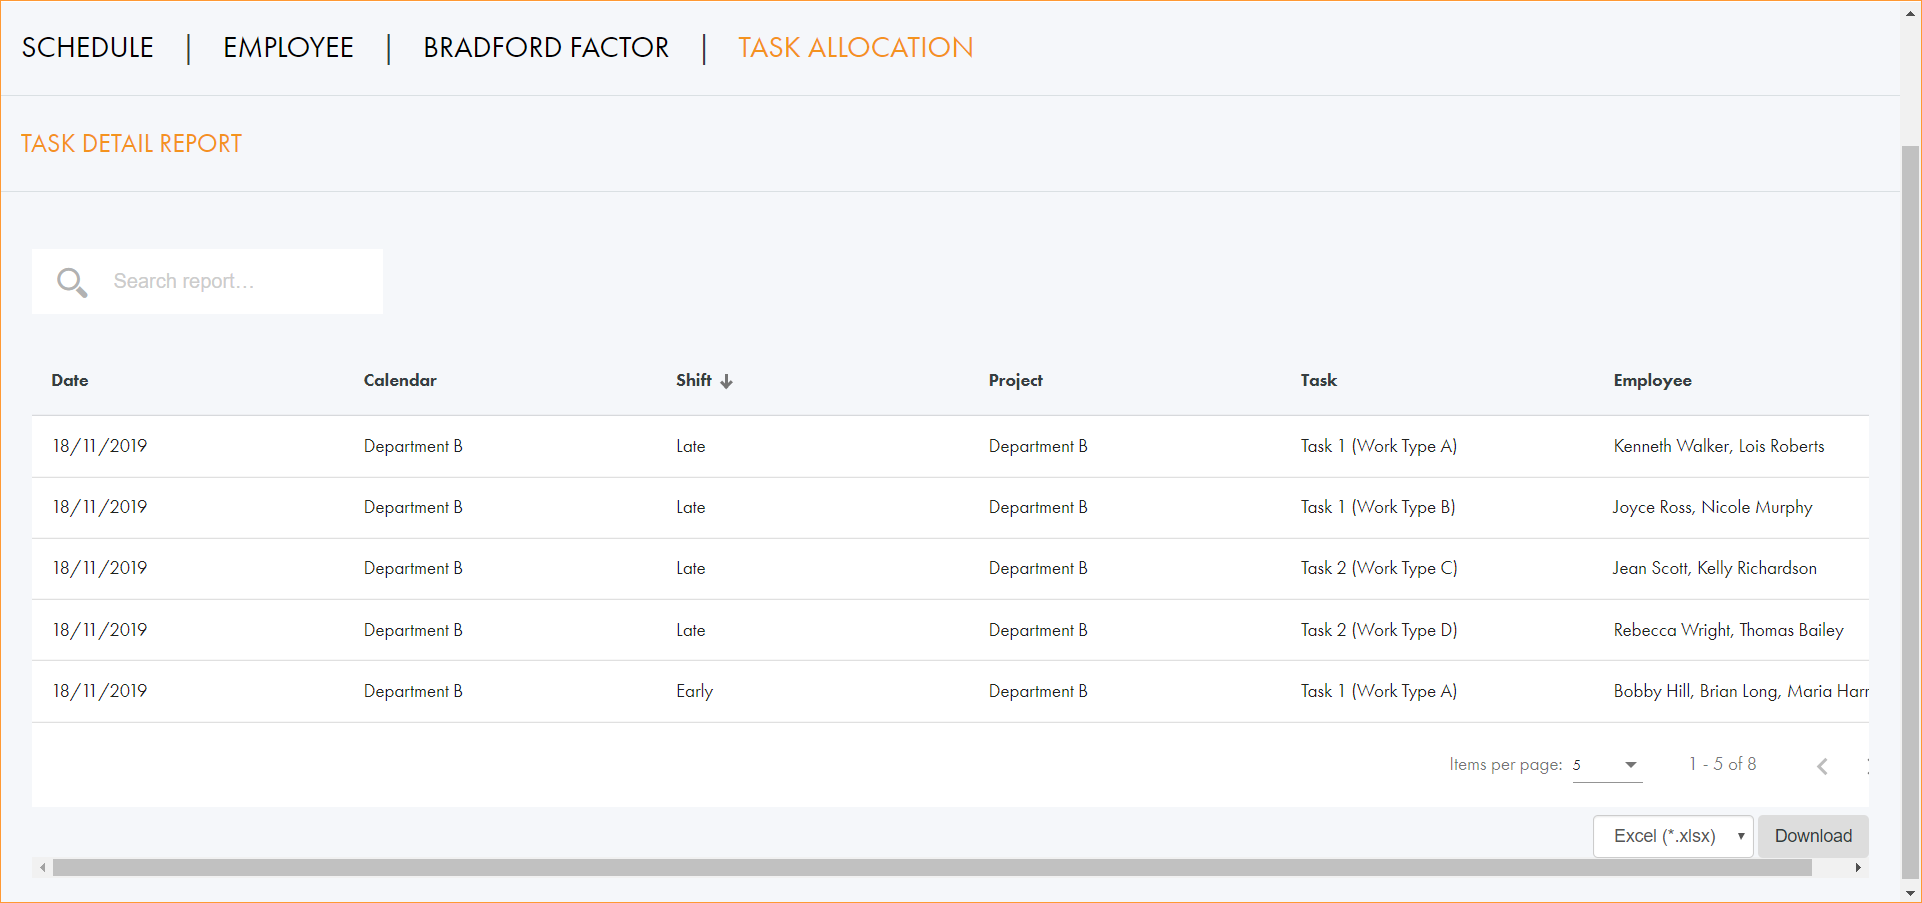
By Task. See lists of employees assigned to the tasks for each date/shift.
-
-
Click RUN REPORT.
-
All employees within the parameters you have set are listed with their allocated tasks:
-
Click in the column headers to sort the information displayed as required.
-
Use the navigation tools at the bottom of the screen to determine the number of records that are displayed on the screen and move through the pages of records.
-
Choose your preferred download format from the dropdown list at the bottom of the screen.
-
Click Download.
-